Listing Lists

I really enjoy making lists.  Sometimes I think I make lists just to keep from doing the things that are actually on the list!  If a list starts to look messy, I will re-write it on the back of a fresh scrap of paper.  (We are all about reusing here...I would use the marker board if it wasn't filled with a different list!)  For digital proof, just click on the label "Project Lists" & you'll see what I mean.  So, a few days ago I got excited when I could cross something off my Summer Plans.  Then, just today, I realized that I could also cross something off our 2012 Home Goals!  Feel free to click the links to see the progress we've made so far this year.

Anyway, all this crossing off made me realize something.  I have only crossed off three of the eleven items on my goals for the year & we are already half way through the year!  How'd that happen?  (I guess I have been kinda busy with this cute thing!)

The good news is that we have nearly completed the fire pit.  The bad news is that it wasn't on our original list!  Since a post without pictures is no fun, here's a little sneak of our first fire...

{My pictures do not do this space justice!}

So, how are your goals coming along?

Stylish Storage

On Friday I shared the reveal of our half-bathroom makeover.  Today I am going to show you where all of our bathroom essentials are stored!

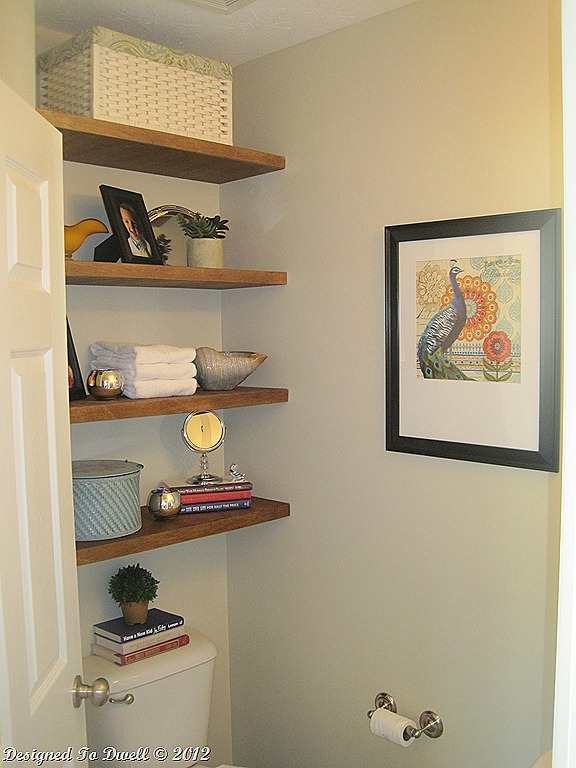
{Floating Shelves}

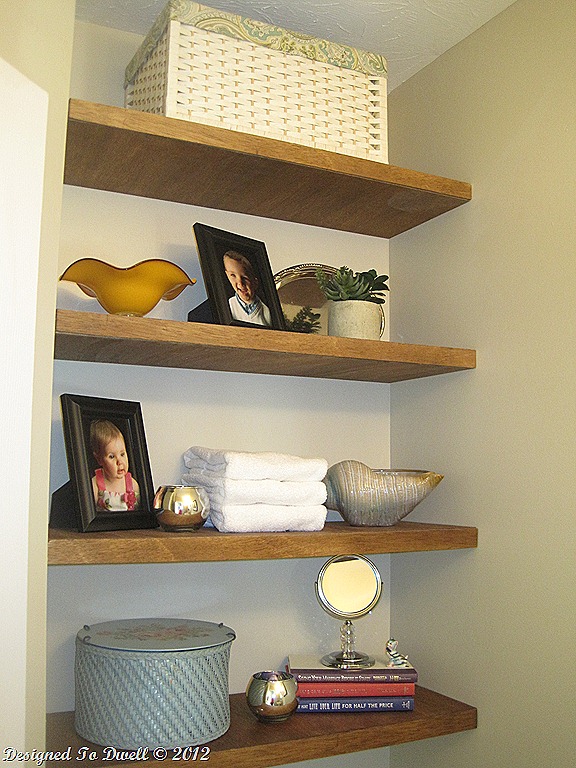
We stored extra toilet paper, toothbrushes, toothpaste, & feminine products in the basket on the top shelf.  The basket came from Garden Ridge a couple of years ago.

{Yes, I did just post that on the Internet for all to see!}

I hid the kids toothbrushes & toothpaste inside the shell bowl.  I found this shell for $9.99 at Garden Ridge.

{Shell Storage}

The blue basket on the bottom shelf was my grandmother's sewing basket.  I am using it to store extra toilet paper, flushable wipes, a hairbrush, detangler, & eyeglass cleaner.

{Hidden Storage}


I am so glad to finally have storage in this bathroom!  Having these essentials in one place will definitely save us some time in the morning.  

So, how do you conceal your bathroom necessities?

Sharing here:


Organize It Party at Our Fifth House


Handy Half Bath

Our tiny bathroom had no storage, & with three children to get ready in the mornings, I needed a place to stash their toothbrushes, hair supplies, & extra toilet paper.  On Wednesday, I showed you how my husband helped remedy this problem by building floating shelves in the recessed area above the toilet.  Today, I’ll show you how I brought style & functionality together to create a bathroom that finally works for our family.

Designed To Dwell  {Half Bathroom}

Here is what the bathroom looked like before the redo:


Before adding the shelves, I took down the large towel rack & filled in the holes.  Then I painted the walls Toasted Almond by Olympic Paints.  I love how much lighter the room is now!

IMG_4686

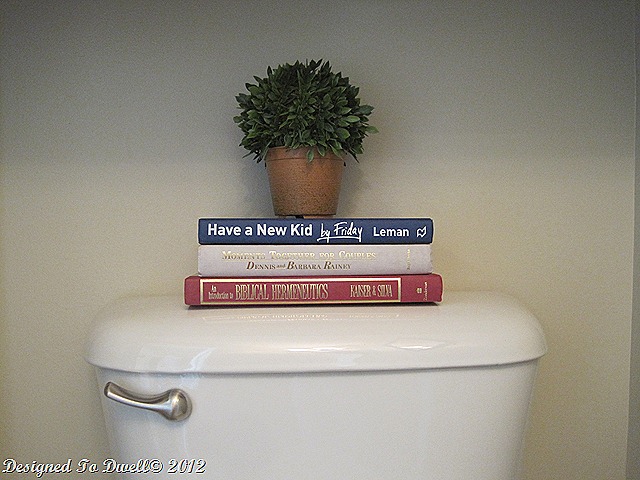
We also changed the handle out on the toilet with a brushed nickel one.  It’s a great way to upgrade the toilet for a small amount of money!  The faux boxwood is from Michael’s.

IMG_4691

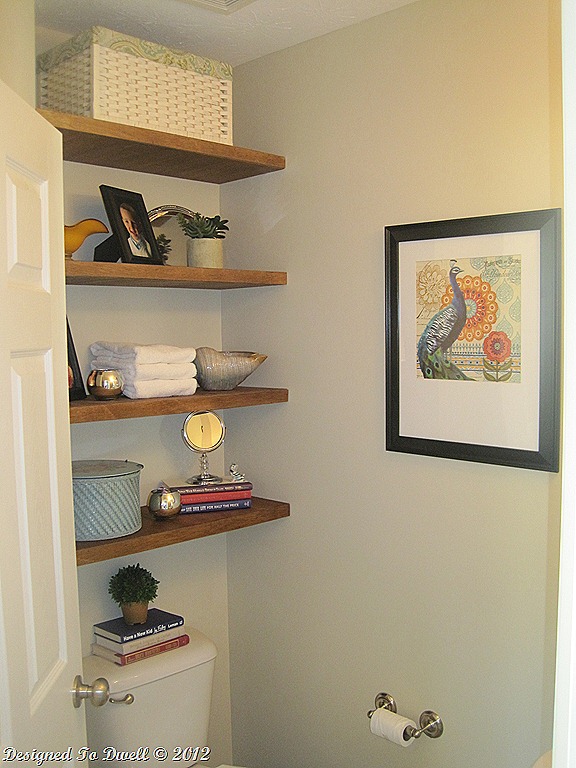
I enjoyed shopping the house & a few stores for accessories for the shelves.  I bought the basket on the top shelf from Garden Ridge a couple of years ago.  The gold bowl on the second shelf was from a flower arrangement my mother-in-law gave me years ago.  I saved it because I loved it, but this is the first time I’ve been able to use it in my décor.  The silver tray is from Dollar Tree & the succulents-I-will-never-kill were about $10 from Target!  The candle holder & shell bowl on the third shelf were both from Garden Ridge.  The bottom shelf holds my grandmother’s sewing basket & tiny kitten figurine.  The mirror is from Marshall’s.

IMG_4689

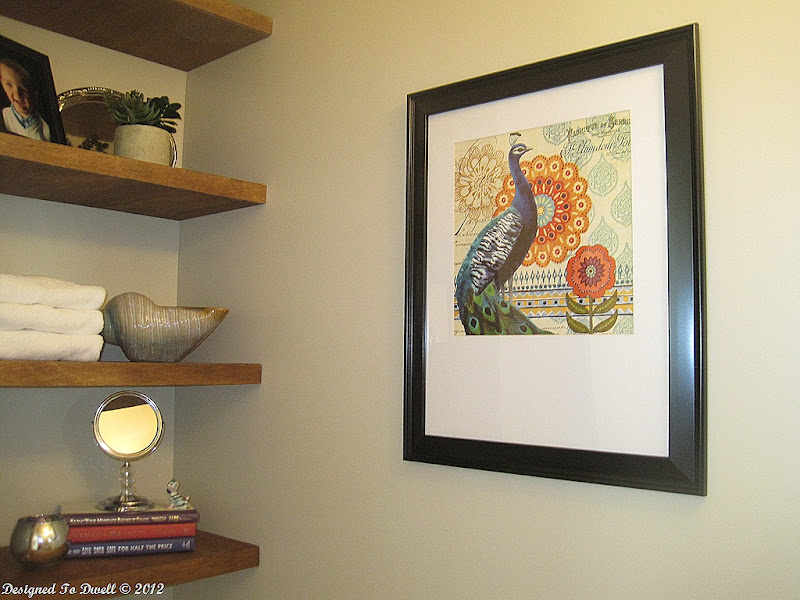
I’m kind of in love with this matted peacock print from Hobby Lobby.  It was originally $15.99, but I got it for half off.  I think it adds a little quirkiness to the room!  The frame was about $12 from Wal-Mart.

IMG_4692

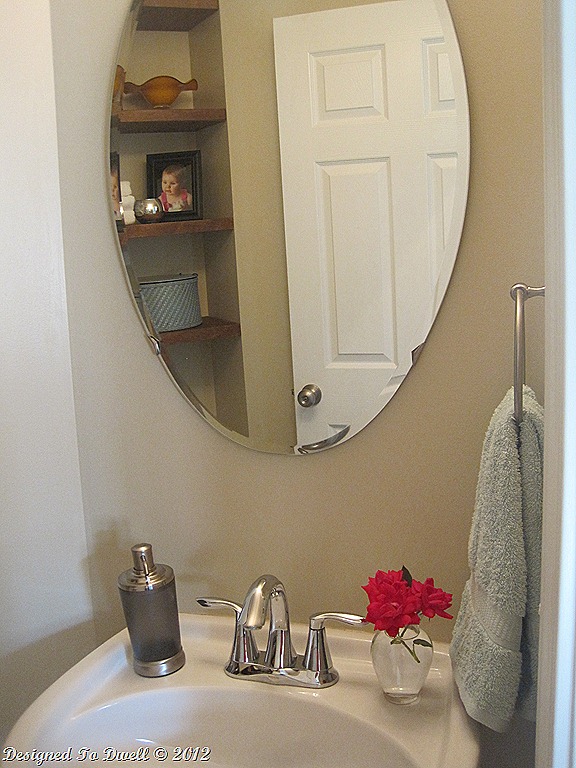
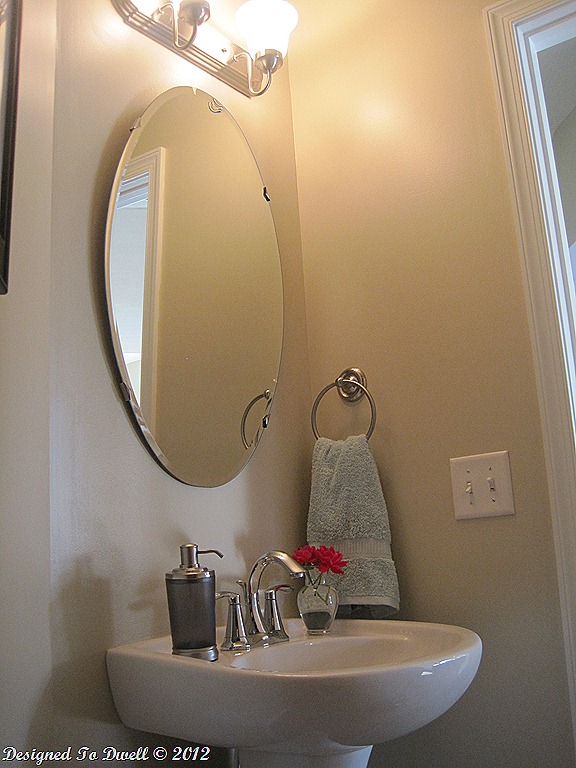
The sink portion of the bathroom was a little harder to photograph.  We replaced the large towel rod with a smaller towel ring & changed the toilet paper holder to match.  I also added a new soap dispenser.  It’s not my favorite soap dispenser ever, but I needed something that was plastic, since my five-year-old loves to play in the sink…urgh!  It came from Target & the hand towel is from Marshall’s.

Here is another shot of this side of the room:

IMG_4693

I just love looking at this room now!  On Monday, I’ll show you where I hid the toilet paper, wipes, toothbrushes, toothpaste, hair accessories, eye glass cleaner, & more! 
  IMG_4688

I’d love for you to follow along as we upgrade our builder-basic home!  You can follow Designed to Dwell through Google Friend Connect or receive posts through e-mail.  Have a great weekend!

Sharing at some of these great blogs:

Working With What You Have link up at emilyaclark.com


Adding Storage In A Tiny Bathroom

The most-used bathroom in our house is also the smallest.  I would say the size of our half-bath is comparable to that of a coat closet!  Since we spend most of our time on the main floor, this bathroom sees a lot of traffic & needs a lot of storage.  We needed space to store extra toilet paper, toothpaste & toothbrushes (It's just easier if the kids brush their teeth downstairs after breakfast.), hairbrushes, & more!  With no room for a sink vanity, we decided to use the vertical space to fulfill our storage needs.

{Built-In Floating Shelves}

We decided to build these shelves in a recessed area above the toilet tank.  After deciding how many shelves we wanted, the amount of space between each shelf, the thickness of the shelves, & the amount of space needed above the toilet, my husband nailed a half-inch strip of wood along the three sides of wall to act as bracing for the shelves.  (If you are attempting this project, don't forget to make sure the braces are all level!)

{Shelf Braces}

Next, Mark cut the wood for the shelves.  We wanted our shelves to be 1 1/2 inches think, so we bought 1/2 inch thick sanded plywood.  He cut the top & bottom of each shelf to size & then cut & routed a molding strip for the front with a 1/2 inch bit.  

{Top, Bottom, & Front of Shelf}

After I stained (Minwax Early American) & applied polyurethane to each piece of wood, they were ready to be installed.  Mark nailed in the top & bottom of each shelf to the braces.

{Shelves Before Front Molding}

Finally, Mark added the front strip of molding to complete our custom shelves.

{Finished Floating Shelves}

Here is another view of the recessed area:

{Floating Shelves}

Here is what the room looked like before the shelves:

{Before}

I'm so glad to finally have space to store all the bathroom essentials!  Friday I should be back to show you the finished room!  I've been having a good time styling the shelves!  See you then!


The Goods

On Friday, I left you hanging with what I bought on my three hour shopping excursion.  (I'm sure the suspense was killing you!)  Anyway, here are the goods:

I thought this basket would be perfect to stash away some of Evalyse's baby toys.  I found it at Garden Ridge for $9.99.


I also found some great accessories for the half bath makeover, which I am hoping to start this week!  I bought the shell bowl ($9.99) and the silver candle holders ($3.99) at Garden Ridge.  The light blue towel ($3.99) and mirror ($9.99) were from Marshall's.  The matted peacock print was originally $15.99 from Hobby Lobby, but I got it on sale for 50% off.
 

The last item I scored was this flower wall hanging.  It was originally $29.99 at Hobby Lobby, but I bought it at 50% off.  I hope to use this on the patio makeover in a few weeks.
 

So, have you found any good buys lately? 


Shopping Without a List

Okay, so technically I had a list, I just didn't buy anything on it!  Oops!  I had a few hours to kill while the kids were at Bible Day Camp, so I decided to have some fun shopping at a few of my favorite stores.

The first store I hit up was Garden Ridge.  While I was there, I decided to multi-task & turn my shopping trip into a blog post.  Hope you don't mind!

This 4x6 rug was only about $25.  This would have been perfect for my entry way!


I like the design on this indoor/outdoor rug.  It was a larger rug (maybe a 5x7?) & was priced around $50.


Too bad I'm cheap, because I love the shape of these $25 lamps.  (My local Goodwill has 50% off everything this Saturday, so maybe I can find some with a similar shape!)


I'm thinking about going back for one of these rose bowls for the living room.  I figured I should wait for curtains & pillows, just to make sure the color matches.


I really hope they still have this coffee table when I go back.  It's pretty much a steal for $60.


I thought this large chevron flower pot was too cute.  I decided I've killed enough flowers lately.  Maybe someone who actually waters their plants will buy it!


Wouldn't this star-shaped ottoman be great for a little boy's room?  


Garden Ridge also has lots of great accent furniture...


and a pretty good assortment of "unique" items...

This might make a great time-out spot!!


For $20 you can get yourself a gnome holding a solar light.  Not what your looking for?  They also have some gnomes dressed as motorcyclists & police officers!


I'll show you what I actually bought on Monday.  For some reason my upload button isn't working now & my baby is screaming!  Better go!  Have a great weekend!


SO FA-ortunate!

I feel so fortunate to finally have a new sofa for the living room!  I wasn't sure if it would be in the budget to purchase a new one, but a few weeks ago Mark gave me the go-ahead.  Ever since my Craigslist Fail, I have been pinning sofa styles I like in hopes of actually getting it right this time.  I found one with clean lines, nail head trim, & an affordable price tag & drooled over it until a few weeks ago.


Source: pier1.com via Wendy on Pinterest

The day I went to check it out at Pier 1, the price was marked wrong, so I actually got it for $100 less than the original price!  Score!

Here is my Carmen Sofa in Ecru....


According to the sales lady, these sofas are manufactured by Lazy Boy & have an excellent warranty.  They come Scotch Guarded, but she recommended re-treating it.  I am concerned about it getting dirty (especially since there are no flippable back cushions!), but my kids rarely go in the living room, so I think she will be okay.  (Fingers crossed!)

Here is the original sofa in the living room:


Nothing was wrong with it, it just didn't seem to fit the room or the look I was going for.  We are saving it for when the basement is finished.

After moving that one to the basement, I purchased the notorious Craigslist Fail Love Seat to replace it.


So, do you think I'm crazy for buying a white sofa???


The Last Cavalcade Home

We ended up taking our kids to tour all the homes on the Cavalcade, which was a big mistake!  They actually really like looking at houses, but were starting to get a little too rambunctious towards the end.  Luckily, the last house was near the in-laws, so we dropped them off before taking a look at the last house.

This house is the Ashfield Q built by Drees Homes.

We decided to start this tour upstairs.  Here is the girl's room...


And the boy's room...


The guest bedroom...


Here is the upstairs loft.  It looks like it's set up for homework & games.


The master bedroom...


The master bathroom...


The finished basement...


Back on the main floor, here is the office, which sets at the back of the home. 


The sun room...


The kitchen...


This bench was in a small hallway leading to the garage.


Well, that concludes all the homes we checked out for Cavalcade.  Which one was your favorite?  

LinkWithin

Related Posts Plugin for WordPress, Blogger...