Family Room Challenge: Tweaking the Entertainment Center

It’s time for another One Room Challenge update on the progress in our family room.  This past week, we spent our time re-working the entertainment center we had originally built five years ago from some Craigslist bookshelves & a sink vanity.  There was nothing wrong with the unit per say, but I had grown tired of it’s look & wanted something that wasn’t as big & bulky.  The TV cabinet was at least two feet deep & the top was probably 7 feet tall, so it took up a lot of visual space in the room.  Now that we have two full-sized sofas & a large coffee table in the room, I was ready to downsize these pieces.

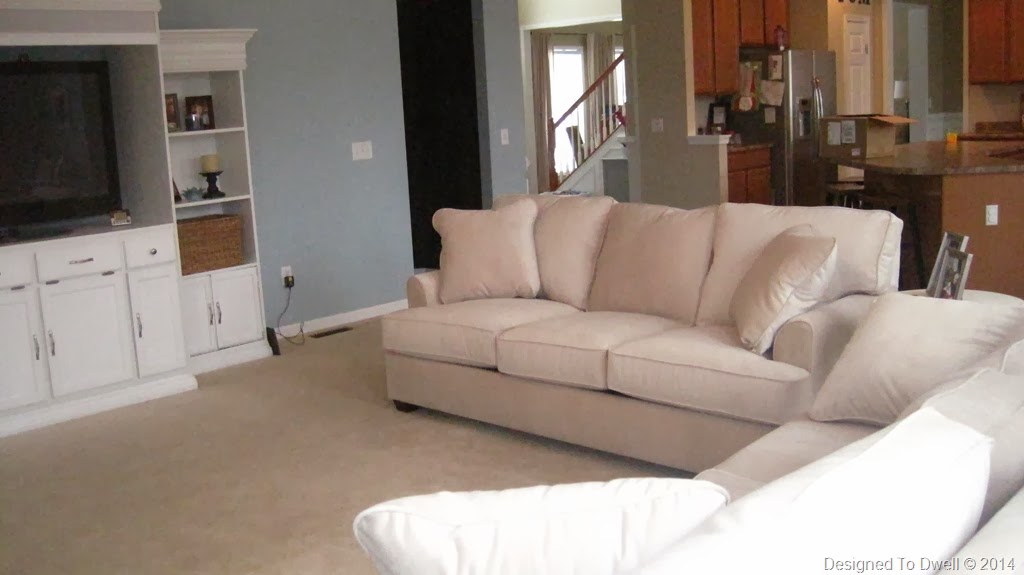
First, let’s take a look at what we were starting with:


After seeing this design board come to life, I really liked the modern look of the dark TV cabinets with brass ring hardware in the middle of the doors.  Since we are making over this room on a pretty tight budget, we decided not to spend money on the Ikea Besta cabinets, but instead tweak our current cabinet to have a similar look.  Here’s what we did:

tv cabinet2

1. After removing all the doors & drawers, my husband first removed the top pieces & moldings.

2. Next, Mark took off the taller side pieces we had added to the cabinet.

4. (Oops!  I put these in the wrong order!)  The third step was to decrease the depth of the cabinet.  My husband marked a straight edge on the remaining top & side pieces about 17” from the front.  Then, he used his circular saw to cut off the excess on the sides & top.

3. Finally, we cut the front & sides right below the drawers, to lower the height of the TV. 

IMG_8848

I guess at some point we also removed all the base molding.  Once the piece was the correct proportions, we began building it back.  First, we re-attached the top, added the thin back piece, cut new pieces of finished plywood to add to the sides, & re-attached the baseboard trim along the three bottom sides.

Then, I painted the whole piece in a satin black & added these 3-inch ring pulls to the doors.

Here it is today: 

IMG_8891

You can still see where I filled the holes from the old hardware, so I need to work on those a little more. 

IMG_8893

Also, please ignore the kitchen set.  It is only there temporarily!

The next step was to make doors for the bookcases (in the picture at the top of this post).  This is the room our kids play in primarily, so I wanted a concealed space to store books, games, & toys.  My husband started out by cutting some 1x3 pine boards to size & then routed one side on each board.  He used the kreg jig to attach each of the four 1x2s together.

Building Bookcase Doors

Adding Doors to a Bookcase

Originally I wanted these doors to be mirrored, but I realized they would either constantly look dirty or I would always be cleaning them, so I opted for the cheaper, kid friendlier option, sanded plywood.  Mark inserted it in the frame & added a few staples to hold it in.

Adding Doors to Bookshelves

I knew the doors would need a little pizazz, so I searched the internet for an easy design, & sketched up a few choices for Mark to look at.  He liked none of them.  (I wasn’t crazy about any of them either…)  I mentioned that I liked the design on the glass doors on our secretary…


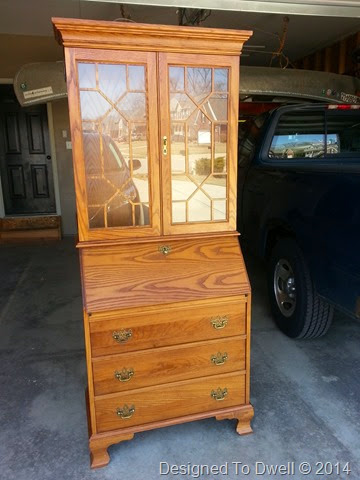
and he thought that was do-able.  A few hours later, he had the design sketched on the doors & was cutting the pieces.  He just used some lock-tight to glue them on & finished his work off caulking the whole thing.

When all that was done, I painted the bookcases & doors.  Once dry, Mark used some concealed hinges to mount the doors.

DIY Bookcase Door

I spray painted these Ikea handles gold & installed them on the doors.

IMG_8906

Here is the whole setup now…

Entertainment Center

Sorry for all the glares on the TV.

Bookcases Flanking TV

One more look back…

entcent

DIY TV Console

Along the way, I had a few doubts…Did the door design look too gothic?  Would one big door on the bookcases look too big?  Would the contrast between the black TV console & white bookcases be too much?  In the end, I really like the way they turned out!  Looking at the above picture, you would never know those were the same pieces as the “before” picture!  The icing on the cake is all the extra storage we have!  After filling up the bookcases with books, toys, & the puzzles & games (that were previously stored in the kitchen) we still have two shelves of unused space!

TV Setup

There are only two weeks left before this One Room Challenge is finished.  Here’s what I have left to do:
  • Paint walls & trim
  • Add window trim
  • Hang curtain panels
  • Make & hang roman blinds on side windows
  • Build coffee table
  • Address toy cubbies
  • Refinish side table
  • Hang art
  • Build console table
  • Tweak TV unit
  • Add doors to bookcases
  • Add pillows, lamps, rug, & accessories
This week I’m hoping to make the pillows & faux roman shades.  Maybe I can sweet talk my husband into starting on the console table too!

In case you missed out on anything, check out my previous progress:

Week One- Before & A Plan
Week Two- DIY Coffee Table
Week Three- More Progress

You can find many more room makeovers in progress on Linda’s link up party here.


I'm also linking to the Best of the Nest party.


Family Room Challenge: More Progress

This has been a productive week in the family room!  I gave the room a fresh coat of paint—Cosmic Rays by Olympic.  It is a shade lighter than what was originally on the walls.  After that, Mark framed out all the windows & I painted all the trim.

Window Framing

We switched out the curtains & rods.  The Vilborg curtains from Ikea really freshen up the room’s look.

Vilborg Curtains

I also refinished the round side table, which went looking like this:

Before

to this:

Refinished Table


Family Room Side Table

The Tarva chest is replacing this toy shelf.  I painted it Aqua Bay by Olympic Paints & added some cheap knobs to it.  (It is obviously not styled up…)

Tarva Chest

I absolutely love Vintage Printable & printed off eight images.  We framed them & hung 4 of them on each side of the fireplace.  You can find the links to each printable on my Family Room Pinterest Board.

Leaf & Bird Art

Not bad for free art, ay?

Leaf & Bird Art

This week I’m hoping we can get tweak the current entertainment center.

To Do
  • Paint walls & trim
  • Add window trim
  • Hang curtain panels
  • Make & hang roman blinds on side windows
  • Build coffee table
  • Address toy cubbies
  • Refinish side table
  • Hang art
  • Build console table
  • Tweak TV unit
  • Add doors to bookcases
  • Add pillows, lamps, rug, & accessories
To see more progress from this makeover, visit my posts from Week One & Week Two.  To see more One Room Challenge makeovers, visit the link party here


Family Room Challenge: DIY Coffee Table

When we purchased new sofas earlier this year, I decided to forego the loveseat & just purchase two identical sofas.  With the two sofas in place, our small coffee table no longer worked in the arrangement.  We needed something bigger that would be accessible from both couches.  Since my online searches were getting me nowhere & this makeover is on a pretty tight budget, we decided to build our own coffee table. 

A few weeks ago, Shelley, from Crazy Wonderful built her own coffee table & I loved the style!  Since she hasn't gotten around to a tutorial, I decided to create my own by combining plans from AKA Design & Ana White that I had already pinned to my Family Room board.

We decided to make our table 45x44 inches & began by following the plan from AKA Design.  We used 2x2 pieces of pine to build the base & screwed them together for stability (instead of nailing, which the plan mentions). 

Coffee Table Base

Once the base was put together, we screwed our 2x4 boards to the top (screws went in from the bottom).

DIY Coffee Table

We added an X on two of the four sides using Ana White’s plan as a guide.  We screwed each end part of the X into the base & nailed & screwed the middle pieces together.

X Base Coffee Table

We were pretty happy with the table at this point.  Some of the wood was pretty rough, so Mark used an orbital sander to smooth everything out.  We filled in our screw holes with stainable wood filler & I created my own stain from Minwax Early American & Ipswich Pine stains.  I used about 2 parts Ipswich Pine to 1 part Early American.  I followed the stain with three coats of matte polyurethane & Mark added some L brackets in each corner of the front & back base for added stability.

DIY X Base Coffee Table

We are first focusing on building & tweaking our furniture for the room, so I just grabbed what I could find to try & style the coffee table!  Hopefully, it will look better for the final reveal! 

Coffee Table Top

Once all the furniture is finished we will move on to painting the walls, trimming out the windows, & accessorizing.  Click here to see the plan for the room.

DIY Coffee Table  

I am so happy with how this coffee table turned out!  We are starting to work on tweaking the entertainment center so hopefully that will be smooth sailing too!  I'll be back to share more on that next week!

Week One:  Before & A Plan

Be sure to check out other week two updates at Calling It Home!


Linking here:

TDC Before and After

Family Room Makeover: Before & A Plan

If you have skimmed my blog over the past year, you may remember when we got new sofas for the family room & I declared that I was going to make some changes.  Well, that little post was written in January, & since then, very little changes have actually been made to the room.  Luckily, Linda, from Calling it Home has given me a swift kick in the rear to actually get these projects going!  (Okay, Linda hasn’t literally kicked me…she doesn’t even know who I am!)  Anyway, she is hosting a One Room Challenge linking party, where participants have six weeks to redo a room in their home.  I am using this challenge as motivation to finally get my family room into shape.

Last fall I participated in the challenge & re-did my kids’ shared bathroom.  Here’s how that turned out:

bathroom before

and after…


The above is an updated picture of the bathroom that better reflects the colors.  You can see more of them here or go to my One Room Challenge Reveal here.  I still am so happy with how it turned out!  Hopefully, I’ll feel the same way about our family room in six weeks!

Here is the current state of the room:


So, now for the plans…  (You can see my original plans here.)

OB-Family Room 2

Here is what I plan to accomplish in six weeks:
  • Repaint walls Cosmic Rays by Olympic Paint (a lighter shade of the current color)
  • Add trim around windows
  • New curtains & rods
  • Refinish round side table
  • Build coffee table
  • Build TV cabinet (similar to the cabinet in the bottom left corner)
  • Tweak current bookshelves to have doors (similar to the top left bookcase)
  • Build a console for behind the couch
  • Accessorize (art, pillows, lamps, flowers, etc.)
  • The rug & accent chairs have already been purchased
I have no idea how these things are going to get finished in just six weeks!  It looks like my husband has a lot of building in his future.  Wish us luck!

Check out all the other future makeovers here!


LinkWithin

Related Posts Plugin for WordPress, Blogger...