
Last week I mentioned that I would give a tutorial of how we installed our chunky chair rail & wainscoting. However, since my husband did all the work, I don't quite feel competent to give a full tutorial, but I will give you lots of "tips" on what we did! You will definitely want to use other sources (google & you tube searches) & look at lots of pictures to figure out exactly the look you are going for & how to achieve it.


{Base for Chair Rail}
Next, we measured & cut the chair rail. Obviously, if you are installing it in a corner or on a crazy angle, you will have to measure & cut the angles accordingly. For the exposed ends, we cut them at a 45 degree angle instead of just making a straight/flat cut. Mark went ahead & nailed the chair rail into place, centered on the base rail that we had previously installed.
To cap it off, you will take an extra piece of chair rail & cut it at a 45 degree angle. Without moving the chair rail, you will bring your saw blade up to a 90 degree angle & cut again. This should create a filler piece that you can glue onto the end of your chair rail giving it a nice, finished look. I'm sure most of the above sounds pretty confusing. You'll most likely want to google a better tutorial on how to do this!
Here's a picture of a capped off end:

{Capped Chair Rail}
First, we needed to decide how much space should be below the chair rail, above the baseboard, & between the boxes. According to our internet search, the spacing between boxes could be between 2 3/4 inches to 3 1/2 inches, but the spacing above & below the boxes could be up to 4 inches wide. We decided to go with a 3 inch spacing all around. (The boxes would start 3 inches below the chair rail, 3 inches above the baseboards, & have 3 inches between them.)
Since we had determined our spacing, my husband took a scrap piece of our 3 inch chair rail & used it as a template to draw lines 3 inches below the chair rail, above the baseboards, & to create the spacing where the walls ended (corners, door frames, etc.). This helped us visualize what some of our boxes would look like.
We were still scratching our heads trying to figure out the sizing of our boxes, but seeing the markings on the wall helped us make some decisions about this. Let me preface this by saying that the boxes on each section of walls should be equal in size, but smaller walls will have smaller boxes, so not all the boxes in the entire space will be the same size. We decided 32 inches was the widest box we would have. Any boxes that would have to be over 32 inches in width would be made into two equal sized boxes spaced 3 inches apart.
Take this wall for example:

The wall is only 48 inches wide, & when we factored in our 3 inch spaces on each end of the box, we could have installed one 42 inch box. Instead, since it was over our rule of 32 inches, we made two boxes that were 19 1/2 inches wide & put a three inch space between them.
To make a basic box, you will cut each piece of molding to the correct size at a 45 degree angle. Then, glue them into place before nailing them into the walls. The final steps are caulking around the boxes, filling nail holes, & painting!
For longer walls, you will have to determine about how many boxes you want along the walls. This wall was about 131 inches long. We decided we wanted five boxes on the wall, which would mean we would have 6 three-inch spaces between the boxes. We multiplied 6 times 3, which is 18 & subtracted it from the length of the wall. (131- 18= 113) Then we divided 113 inches by five boxes which meant each box would be 22.6 inches wide.

Some walls were just too small for boxes. We didn't make any boxes that were smaller than 6 1/2 inches wide.

{Too Small for Wainscoting}

{At 6 1/2 inches wide, the box on the right is our smallest}
Here are some additional pictures of our wainscoting in tricky areas of our entryway:

{Wainscoting on an Angled Wall}

{Wainscoting on a Triangular Wall}
For this triangular shaped wall, we measured the length & determined how many boxes we thought would look good, making sure they were under our maximum width of 32 inches, & equal in size. Because of this criteria, the middle box has an extra slanted piece to it.
{Up the Stairs to the Landing}

{Landing to the Top of the Stairs}
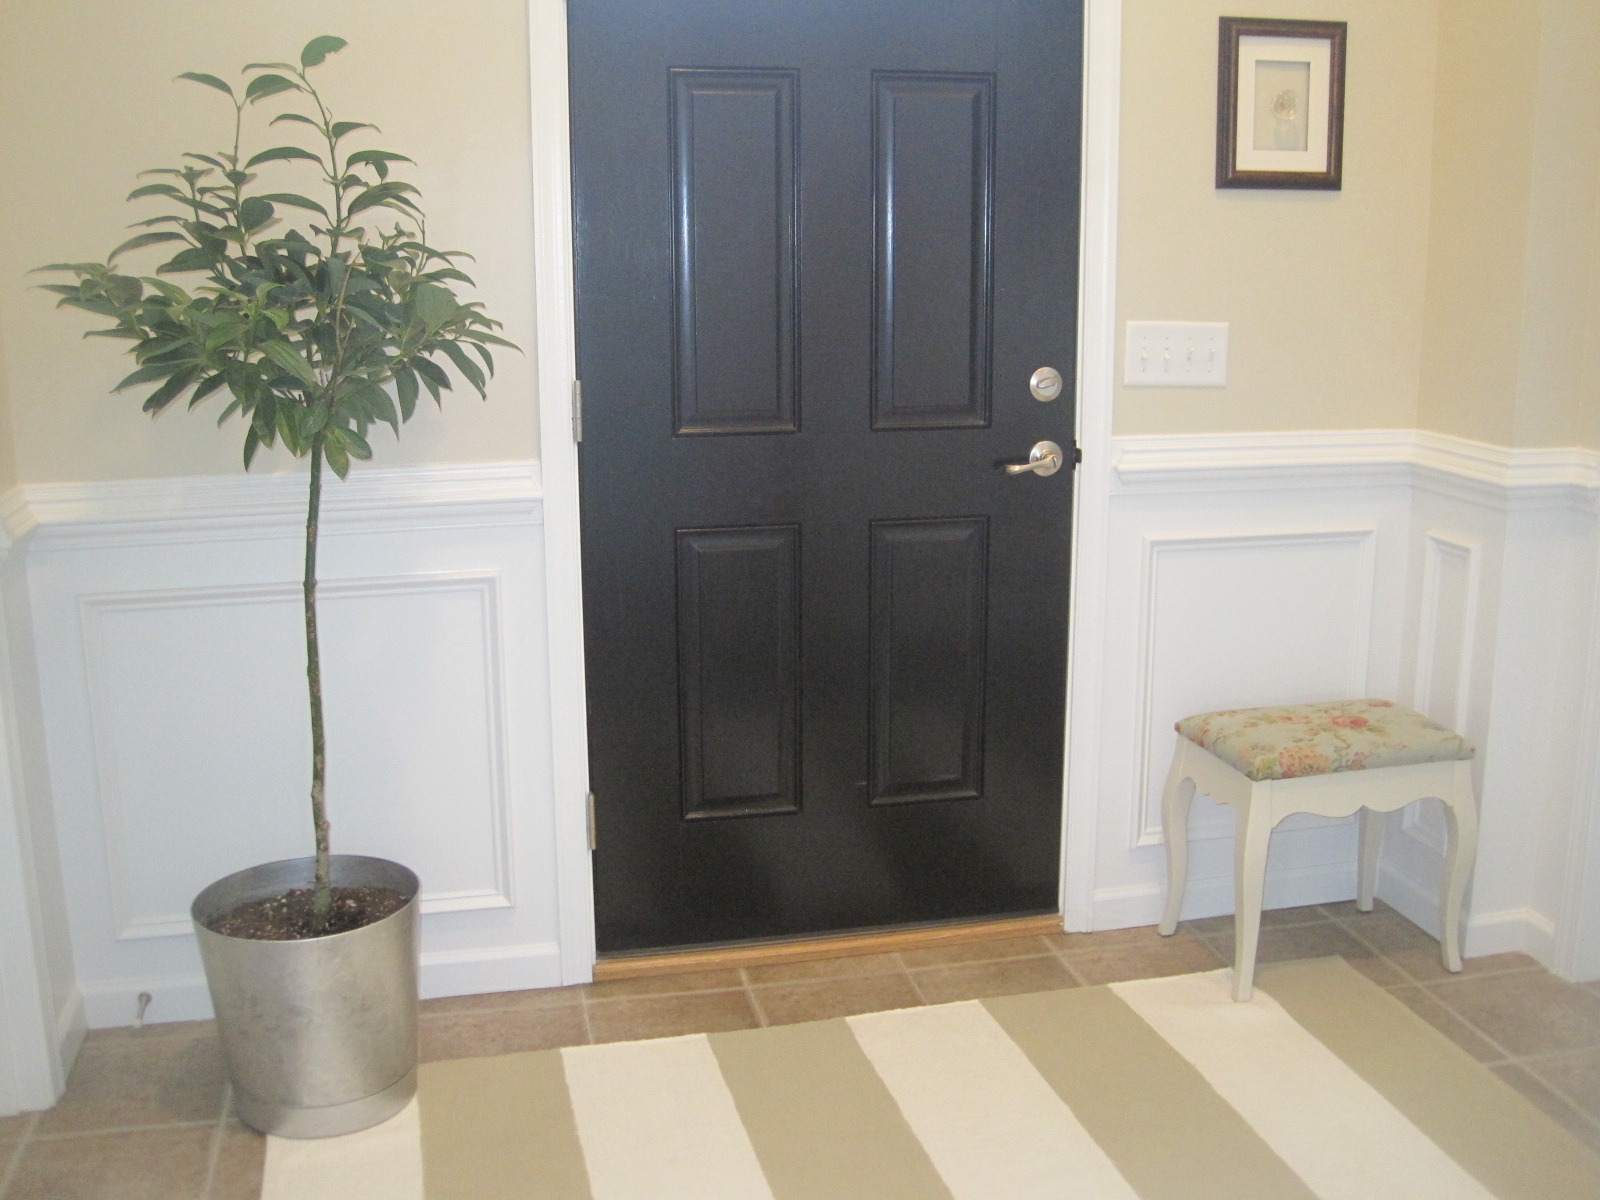
Because this wall is broken up by the door, it was okay for the boxes on each side of the door to be slightly different in size.
Well, I hope this post gives you some answers & doesn't leave you scratching your head! If nothing else, maybe the pictures will give you some ideas on how to add wainscoting on the tricky areas of your walls!
You can see more of the entryway here.
I'll be sharing here:


