Showing posts with label Tips. Show all posts

Now You See It, Now You Don’t

As I’ve mentioned before, we skipped out on the electrical walk through to tell the contractor where we wanted our telephone jacks, power outlets, & light switches.  Due to that mistake, I have found myself having to hide many a power outlet.  Here are a few of my recent hiding spots.

Now you see it…


Power Outlet


…now you don’t!


Hiding a Power Outlet


Now you see it…


Power Outlet


…now you don’t!


IMG_5870


Now you see it…


IMG_5866


…now you don’t!


IMG_5865


I’m really liking the way this peace lilly looks next to the couch in the living room!


IMG_5867


Hopefully I can keep it alive & it will actually grow!

Tips for Buying a New Car

A few weeks ago we got the dreaded phone call that a head gasket had blown in our van.  We decided it was time to purchase a new van instead of spending $2,300 to repair an eight year old van worth $4,000.  The next day, we decided to start shopping.  My husband’s theory was to go to the dealership & ask them what their best price was.  We would then shop around & purchase the van from whatever dealer would give us the best price.

We drove to the dealer, test drove a van, & sat down to negotiate the price.  My husband asked what their best price was, and after the salesman “checked with his manager” came back to tell us he couldn’t give us a price.  His explanation was that if they gave us a price & then we went down the road to the next dealership that they would just beat it by $100 & we would get the car from them.  Instead of being the first price we got, they wanted to be the last, so they could give us the best deal & we would buy from them.

While this made sense, it left us frustrated.  My husband came home & spent several hours researching how the car industry works so he could get us the best deal possible.
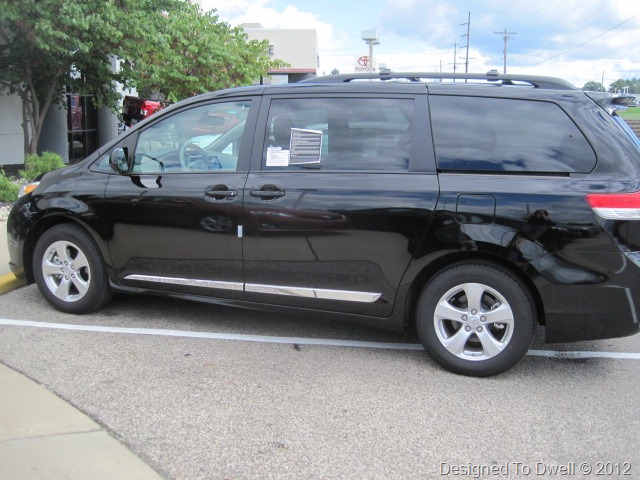
2012 Toyota Sienna

Here are some tips for buying a new car, as well as some things we learned along the way:

1. Choose a car.  What type of car do you want?  What features are you looking for?  Make a list of your “must haves” & then do a search for the “best” car in that category.  We wanted a safe van that could seat eight & had two power sliding doors that would hopefully last a long time.  Over & over again in our searches, the Toyota Sienna seemed to be the best van to meet our needs.

2. Once you know what model you want, check prices online.  Many dealerships list the MSRP, as well as lower online prices.  Check out local dealerships online to see their prices, as well as the fair purchase price on Kelley Blue Book’s website.  You may even want to print out some of these prices for proof!

3. Learn the value of your trade-in.  If you will be trading a vehicle in, check out an estimate of it’s worth at Kelley Blue Book.

4. Consider getting a loan through your bank.  Some of our research hinted that when you finance through a dealer, you sometimes pay more than you think you are for a car.  Okay, that sounds confusing.  Let me explain…When we bought our van eight years ago, we financed through the dealer.  We got a great interest rate & negotiated a price of $22,000 after taxes, title, & registration.  Mark & I were 100% positive we paid $22,000 for that van.  Then the salesmen asked us what we wanted our monthly payments to be.  (I can’t remember what they were, but we settled on a seven year loan to keep our payments down.  Not to worry, we paid the van off in two years!)  Again, Mark & I were positive we paid $22,000 for that van. 

Once the van was paid off & we got the title, we quickly filed it away without a second glance until the day we were going to trade it in.  I looked at the title & low & behold the purchase price listed on the title (NOT including taxes & title) was $27,905!  WHAT?  That, my friends is what happens when you negotiate monthly payments without checking the salesman’s math!  We got who-dood out of nearly $6,000!

This time around, we secured our financing through the bank.  (Be sure to shop around for the best interest rate.)  In general, the dealerships usually have better interest rates than banks, but we weren’t willing to be fooled a second time around!  It saved us a lot of time at the dealership too!

5. Bring a calculator!  If you plan on financing through the dealership, bring a calculator or use a payment calculator like this one.  This way, you will know if the monthly payments the dealer gives you align with what they should be in reality!  I would hate for you to get scammed too!

6. Be careful what you say!  I’m not sure if this is true or not, but this article written by an undercover journalist suggests that there is a device on the phones in the showroom that can allow the salesmen to listen in on your conversations while they are away discussing things with their manager.  Even if it’s not true, the less you say, the better!  (But if it is true, I would definitely suggest some interesting conversations while the salesman is away… “Shew, I am having some bad gas today!)   

7. September through December are the best months to buy a new car according to Street Smart Car Deals.  During this time, dealers are trying to clear their lots of the old models to make room for the new year’s model.  This site also says no matter what month you go, the last week of the month seems to be the best time, since one more sale could reap the salesman a nice bonus.

Lucky for us, dealers are making room for the 2013 models, so we were able to purchase a new 2012 model for a great price.

8. Consider negotiating the price online.  Once we had done our research, we ended up getting quotes online.  We then called the dealer that gave us the best quote & gave him our “top dollar” & asked if he could find us something that met our needs for that price.  To be honest, our top dollar was pretty low, so we ended up having to pay $500 more.  We called back that first salesman we had gone to (the one that didn’t give us a price) & asked if he could beat it.  We knew we must be getting a good deal when he called back to say he couldn’t beat it!

Once we got to the dealer, we went for a quick test drive, signed some paperwork, & left in our shiny new van!  Much less stressful than our previous van’s purchase.

9. Here are some more great resources for buying a new car:
10. If you get the chance, consider reading the article Confessions Of a Car Salesman.  It’s an article written by a journalist that went undercover as a car salesman.  It is pretty eye opening & reads like a novel!  Mark & I never finished it, but it was so juicy we still plan on reading the rest of it even though we already bought a car!

That pretty much sums up our car buying experience.  Hopefully we won’t have another one for a very long time!  In my opinion, buying a car is worse than getting a tooth pulled!  So, did I leave anything out?  Do you have any great tips for buying a new car?  Did you learn anything new?  I’d love to hear your thoughts!

Transforming Tab Curtains

The dining room has needed window treatments since we moved in.  A few weeks ago, I picked up some Lenda curtains from Ikea for $19.99 per pair.  The curtains were the right color & size, but I wasn’t exactly loving the tabbed top.  Originally, I purchased some curtain hanging clips with the intention of cutting off the tabs & using the clips, but I decided to ditch that idea when I realized I didn’t buy enough clips.  Instead, I decided to transform my tab curtains into rod pocket type curtains & today I’m going to show you how I did it!

IMG_4942

Here is what the curtains looked like before the transformation:

IMG_4924

First, I pinned each tab to the back of the curtains.

IMG_4931
Next, I simply sewed a few stitches in each tab to hold it in place.  Make sure to use a strong thread & knot it a few times to ensure a good hold.

IMG_4932

Finally, hang your curtains by sliding the rod into your newly created pocket & admire the transformation!

IMG_4930

Here’s the finished product (sans steaming)!

IMG_4943

Although this project was pretty simple, hand sewing all those individual stitches was time consuming!  Using a machine would have been much quicker, but I was afraid the stitching would show through the front.  What would you have done?

Linking here:

Working With What You Have link up at emilyaclark.com


TDC Before and After

Preparing for a Power Outage

In the past few weeks, our house has been without power for 24 hours two three different times.  (I kid you not, while writing this post our power went out for 22 hours!)  About 2 1/2 years ago, we lost power for seven full days!  I’m determined to be prepared the next time the lights go out, so I am posting some of my research & learning experiences & maybe you can benefit from this too!

Preparation
Here are some supplies you should have handy if the power goes out.

Utility Company Phone Number- It is always a good idea to call the utility company when the power goes out.  This helps them keep track of the number of outages.  They can also usually tell you the cause of the outage & give an estimated time of when it will be back on.  The number we call is completely automated & they even call you back to let you know when the power is restored.

Landline Telephone with Cord- Cordless phones won’t work during power outages & cell towers could be down. 

Cell Phone Car Chargers- If the power goes out for an extended period, it’s a good idea to have a car charger so you can charge your cell phone.

Battery Operated Radio- A radio can help keep you informed of bad weather or important news you may need during a power outage.  When we were without electricity for a week, my husband & I would put the kids to bed & listen to old radio programs on NPR.  It definitely kept us entertained until bedtime! 

Flashlights, flashlights, flashlights- We have flashlights in each bedroom.  We also keep one hung on the inside doorknob to the basement.  This is also helpful when we blow a fuse & have to go down in the dark basement to switch it back on.  It is also a good idea to keep a flashlight near the door you would use if you come home to a power outage.  (Remember, if the power is out, your garage door opener won’t work, so have another way to enter, such as a key!)  It is also good to have a crank or rechargeable flashlight in case you run out of batteries.

Extra Batteries

Candles & a lighter or matches  (If you use these, make sure not to place them anything flammable, & don’t forget to blow them all out before leaving or going to bed!  I personally prefer to use flashlights, but these are always good to have on hand for emergencies.)

House Key- Remember, if you come home to a power outage, your garage door opener & electric key codes won’t work. 

Cold Freezer Packs- Keep some cold packs in the freezer.  You can move them to the refrigerator or use them in a cooler to help preserve food.

Cooler

Ready to Eat Food such as canned tuna or chicken, beef jerkey, nuts, granola bars, peanut butter (for sandwiches), etc. 

Grill or Camp Stove for cooking outdoors

Manual Can Opener

Thermometer to check the temperature inside your freezer or refrigerator

First Aid Kit

When the Lights Go Out…
1. When your power goes out, first check your circuit breaker to make sure you didn’t just blow a fuse. 

2. Call your local utility company to report the outage.  As I mentioned above, they can usually tell you what caused the outage & when the electricity is estimated to be fixed.

3. Stick some ice packs in the refrigerator or move items to a smaller cooler to keep foods that HAVE to be cold, cool.  Remember, not everything in your refrigerator needs to be kept cold (processed cheeses, whole fresh fruits, butter, jelly, ketchup, mustard, etc.).  Moving the items that have to be kept cold to a smaller cooler with several ice packs or ice can prevent them from spoiling. 

Try not to open the refrigerator or freezer doors unless absolutely necessary.  You may want to tie the doors together or put some tape on them to remind yourself & your children not to open them.  Keeping them closed will prevent the cold air from escaping & will help keep your food safe.

4. If the power is expected to be out for a long period of time, I suggest getting out of the house!  When our power was out for a week, I decided to use that time to focus on potty training our daughter.  That was NOT a good idea!  I was beyond stressed.  The laundry was piled up, all of our food was ruined, & my daughter was not cooperating!  Do what you can to save your food & then get out of the house!  You can kill time at the mall, library, or a bookstore.  Try to get home before the sun goes down, so you don’t have to fumble around in the dark!

5. If you find your car locked inside the garage, you can manually open an electric garage door by pulling down on the red cord to disengage the automatic function.  You can watch a short video here to see how this is done.

6. If your power is out for an extended time, such as a week, I recommend doing what you can to keep your home running normally (clean dishes by hand, wash clothes at the laundry mat, throw out spoiled food, etc.).  This will prevent a big work load once the power returns.  

When Power Returns…
When the power comes back on, you will want to make sure the foods left in your refrigerator or freezer are safe to eat.  According to the Food Safety website, refrigerated foods should be safe as long as the power is not out for more than four hours.  You should throw out any foods that have been held at 40 degrees for over two hours.  To check when to keep & discard refrigerated foods, refer to this list.  A freezer full of food should keep temperature for about 48 hours (24 hours for a half-full freezer).  This list is a great reference on what frozen foods are acceptable to keep & which need to be tossed. 


A Few Words About Safety
Always be cautious when using candles.  Never light them near fabrics, such as curtains, or anything that could potentially catch fire.  Make sure they are out of reach for children & pets & that they are not in a spot where they could get easily knocked over.  Store lighters & matches out of reach of children.  Also, make sure you have working battery operated smoke detectors.

Never use a camping stove or grill indoors.

If you usually keep the door that leads from your garage, into your home unlocked, make sure to lock it while your automatic garage door is disengaged.  Otherwise, you could come home to more than just your power missing!

If you chose to have electricity by using a generator, make sure to leave it outside.  Running a generator indoors or even in a closed garage can cause carbon monoxide poisoning & could be lethal!  Read & follow all the safety precautions for the unit.  During one of our recent power outages, a couple had to be treated for carbon monoxide poisoning caused by improperly using a generator.  Use a battery operated carbon monoxide detector to ensure safety. 


Well, hopefully I’ve covered the basics of surviving a power outage!  Did I forget something?  Do you have any tips?  Please share them in the comments below…I may need them, the way this summer is going!

Sharing here:

Tip Junkie handmade projects

Moving Furniture with Ease

A few weeks ago, I decided to move the china cabinet from my dining room into my living room.  The only problem was, I was home by myself with my two kids.  Fortunately, I didn't let that stop me.

I have seen the infomercials for "Mighty Movers" (I think that's what they're called) & thought they would be really helpful.  I decided to make my own, by placing the lids from food jars under each of the legs on the china cabinet.


The lids that have the pop-up seal on them seemed to work best, as they were a little stronger.  Mine came from pickle & salsa jars.


I tilted the cabinet up & then slid the lid under the legs with my feet.

Once I had all the lids under the legs of the cabinet, the phone rang.  I went to answer the it & started gabbing away.  While on the phone, my seven-year-old son came in to interrupt (a normal occurrence EVERY time I'm on the phone...) & let me know that he had moved the cabinet all by himself!

{Reenactment}

Obviously, the jar lids made it easier to slide this cabinet into it's new position.  (Don't worry, this piece of furniture may look a little sad & in disrepair right now, but I have some big plans for it's new life in the living room!) 

So, do you have any other suggestions for moving furniture more easily?  I'd love to hear them!  I figure this one could be modified for hardwood floors by gluing felt to the jar lids.

Wendy


Super Duper Sticky Tack

I LOVE sticky tack!  It can be used for so much more than hanging posters & pictures!  Here are some ways I use it in my home:

1. Sticky tack can help keep candles stay straight (in candle holders). 

2. Sticky tack can help prevent things from moving (note the sticky tack inside the hurricane in the picture below...I wanted the candle holders to stay put, so I adhered them with sticky tack!)


3. You can add sticky tack behind hanging frames to keep them from sliding around & getting crooked.


4. You can use sticky tack to add a little bling to your walls!


How do you use sticky tack?  I'd love to hear!


   Photobucket

Setting Things Straight

Have you ever had this problem?


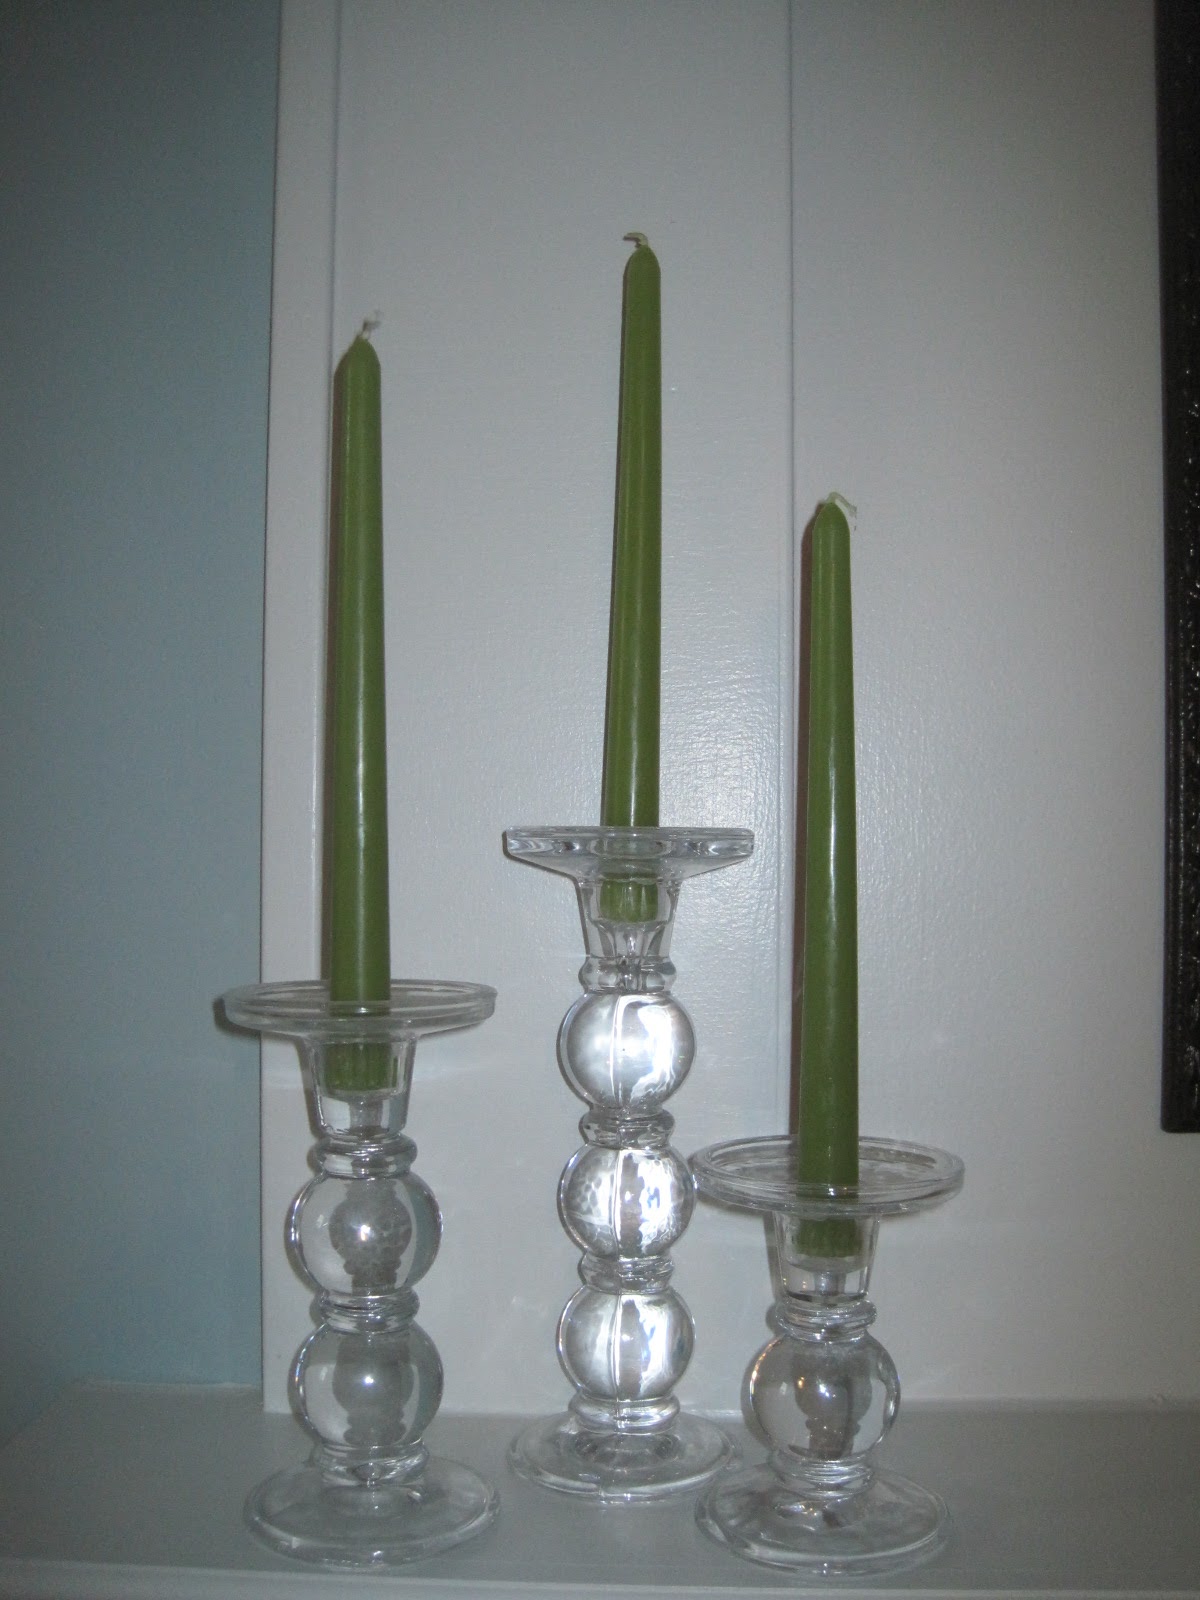
These candles have been driving me crazy!  I have to "set them straight" pretty much every day! 

Well, I came up with an easy fix.  I took my hot glue gun & made a ring around the upper-inner part of the candle holder.  Let it cool for a few seconds, & then insert your candle. 

Here's the ring of glue:


You can barely see it!

And, here is what my candles look like after this quick fix:


Much better!  (After 24 hours & a tweak to that one in the back that still looks a little crooked, they are still straight!)  Woo Hoo!


LinkWithin

Related Posts Plugin for WordPress, Blogger...