Showing posts with label Our Home. Show all posts

Morning Room Challenge: The Big Reveal


Six weeks ago, myself & 177 others, set out to makeover a room, thanks to some motivation from Linda at Calling It Home. I chose to make over one of the few drab spaces left in our home, the morning room. If you would like to get caught up, here is what I have been up to the past few weeks:

Week One: Before Pictures & a Plan
Week Two: Painting the Secretary
Week Three: Adding Trim to an Arched Window
Week Five: Dining Chair Makeover

We have quickly arrived at week six & after some weekend table drama (that I'm not quite ready to talk about), I am happy to say the room is finished!

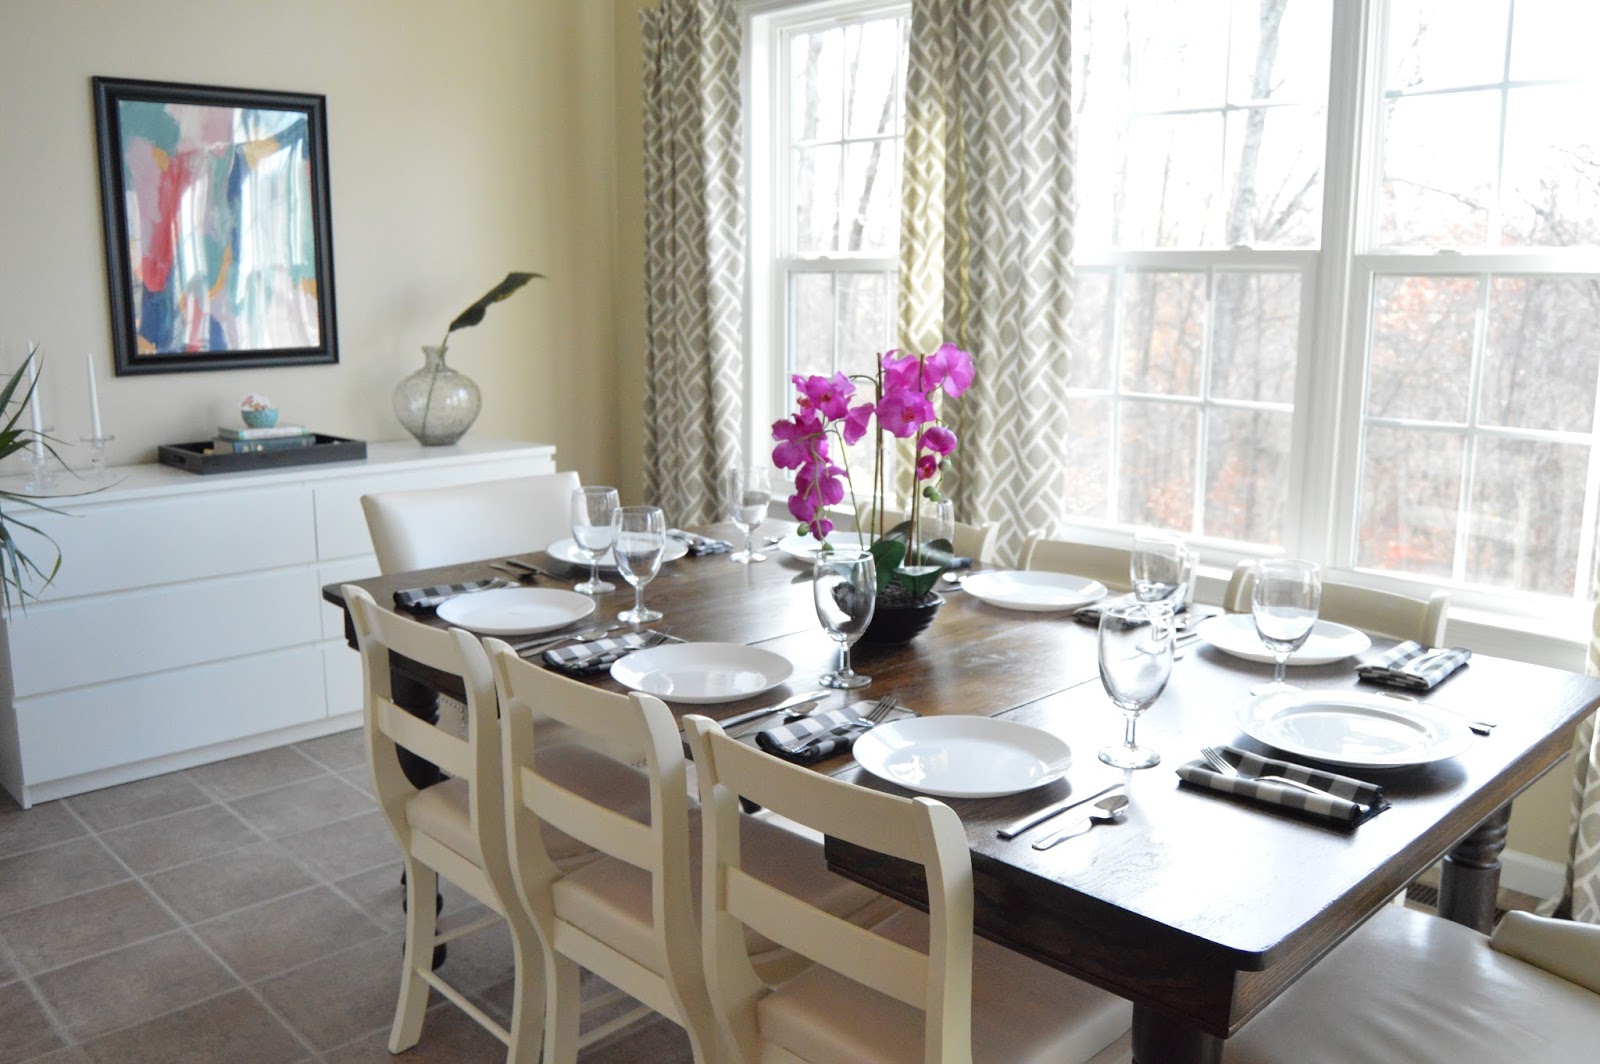

Let's start on the back wall with the Ikea Malm dresser. Maybe someday it will have pretty gold handles & a pair of beautiful lamps, but I couldn't quite justify spending money on those items, especially since I know the lamps would never get turned on!


I needed some pops of color on the back wall, so I painted my own artwork on a piece of poster board & placed it in a black poster frame from Wal-Mart. I'm pretty sure my husband is laughing behind my back about my masterpiece! Ha!


I picked up the black tray from Hobby Lobby. (It originally had a navy & white pattern.) I added a few books we occasionally use at dinner & some question cards in a small bowl from Target. My kids love to take turns asking & answering these questions during dinnertime & I love that it keeps us all at the table a bit longer. #momwin


The  light was an Overstock purchase when we first bought the house. And can we all just pretend that plant isn't shedding yellow leaves? (I'm sure they are just changing colors for fall!)


 The table & chair makeovers were the stuff of nightmares!


I found the six wooden chairs on Craigslist, painted them cream & recovered the seats in a cream leather. Those seat cushions... After working on those I am pretty convinced my brain has left the building! Thank goodness Mark was helping me figure out where we needed to staple.


I purchased the end chairs on Overstock & love the way all the chairs look together.


I am so glad my polyshades table nightmare is over! (sand, stain, strip, sand, stain, polyurethane...) I do love the way it turned out though. This table was in my dad's childhood home & was also the table I grew up eating at, so it is definitely dear to my heart.


Aren't we so fancy with our 89 cent Ikea plates & mismatched silverware? I think the white plates & chairs contrast nicely with the dark wood table. You are welcome to eat with us now that we have seating for eight at the table! (I don't recommend it though. We are having eggs tonight... My sister is the chef in the family!)
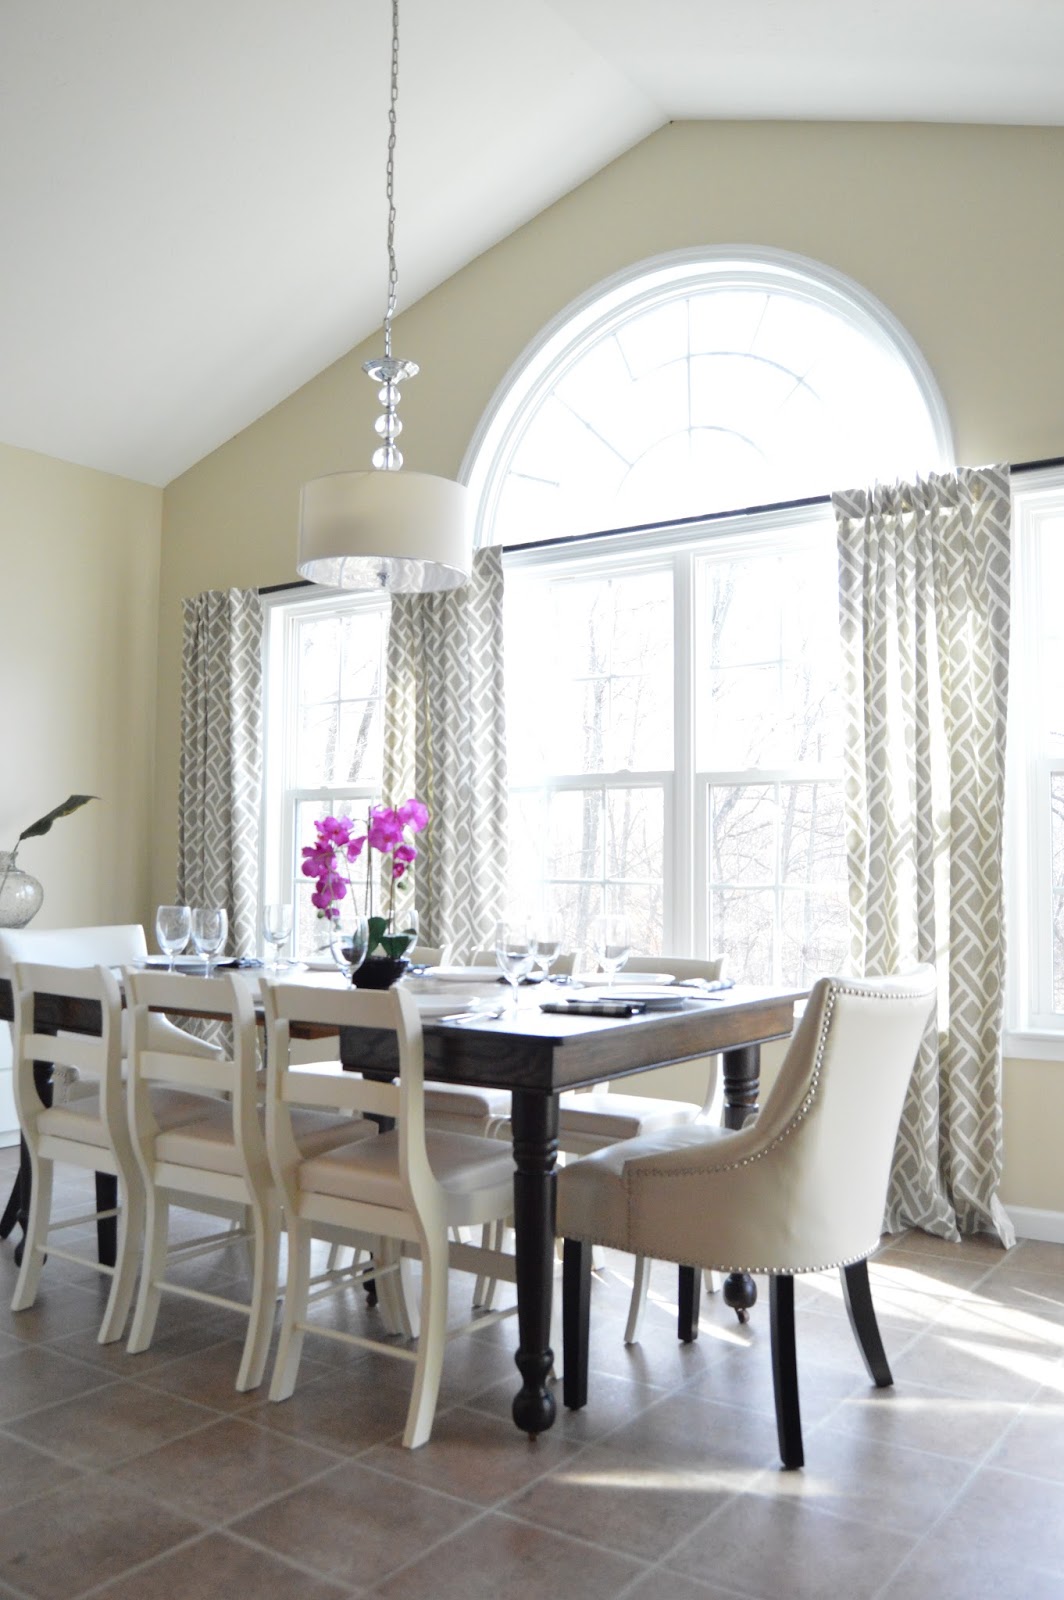


I'd say now would be a great time to discuss those curtains. Remember how I saved about $20 a panel by buying curtains that were too short & ripping the seams out to give me 3- 4 extra inches? Let's just pretend that's because I'm a genius, & not because I can't measure. Mkay?


 The pattern is a great modern print, much better than the floral curtains I had in the room previously. 


The secretary looks so much prettier in it's little black dress! The orange-y oak made this piece look dated, but the black paint gives it a more modern feel.
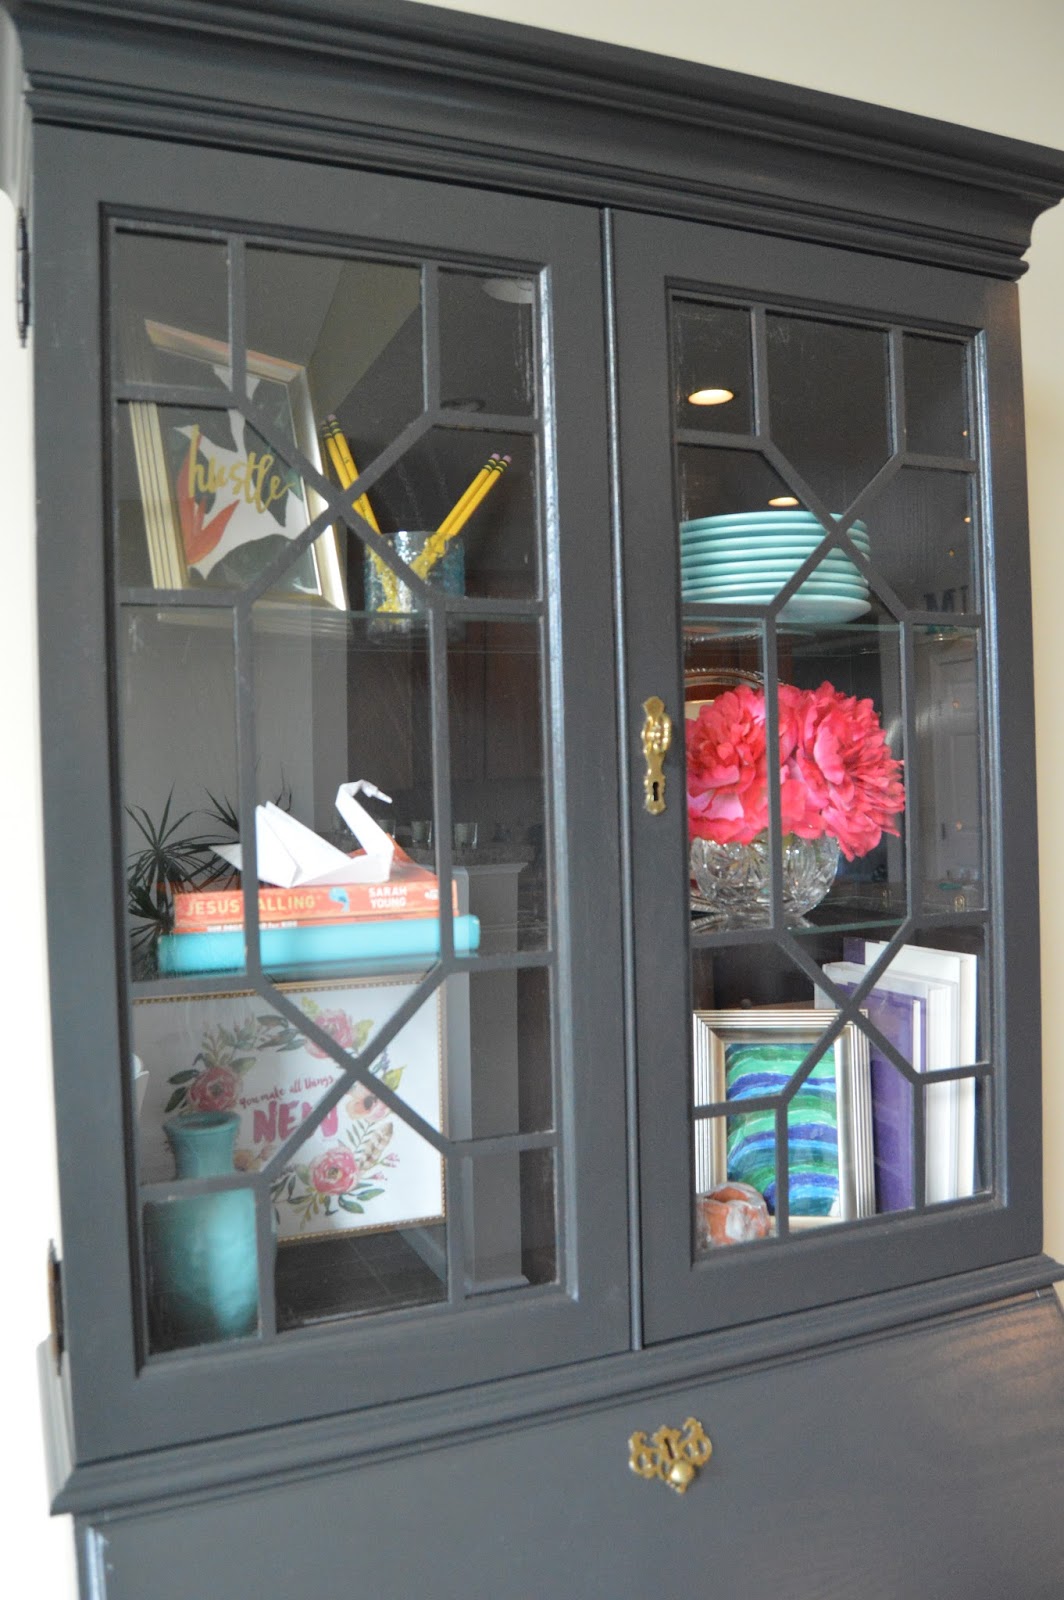

You can find all the details on how I styled it for free, as well as the links to some free printables here.


Now for the fun part! Let's see how far we've come.

The Before:


And After:


Before:


After:


The Plan:
I would love to hear your thoughts on the space, but please don't ask me if my kids made the artwork. If you do, I will probably answer with, "Why yes they did!".


Don't forget to check out all the One Room Challenge makeovers. There should be plenty of inspiration to last you for days!

You can check out all the other spaces I've made over through the One Room Challenge here.




Tween Boy's Bedroom Reveal

As I mentioned last week, my son's room is finally finished!

In my goals for the year, I was hoping to re-decorate my older kids' bedrooms. After upgrading our growing boy to a full-sized bed, the design was no longer working.
 

My goal was to create a lighter, brighter, more functional room with plenty of storage for all Zeke's collections, as well as a place for him to get away from his two younger sisters to read or study. I began the process on my son's room right after his eleventh birthday at the beginning of February, by first coming up with a plan & creating a mood board to help me picture the end result.


Other than the desk & chair, I would say the final product is a good reflection of the original plan.  We got started by removing the chair rail & painted over the dark, orange walls with a much lighter, reflective paint color, Toasted Almond.


The dresser was a Craigslist find that I found a few years ago.  I was trying to re-do this room on a very tight budget, so we ended up building the mirror above it, since I couldn't find one big enough in my price range.


I topped the dresser with a cheap tray from Hobby Lobby & some free printables I found online.


In the corner, I placed a Craigslist chair (the pillow is from Ikea) & we made the letter Z marquee & the faux Roman blinds.


To the left of the window, I created a unique gallery wall, featuring a lot of my son's collections (shark teeth, state quarters, rocks, & shells) along with a couple of printables & an owl he made in art class.


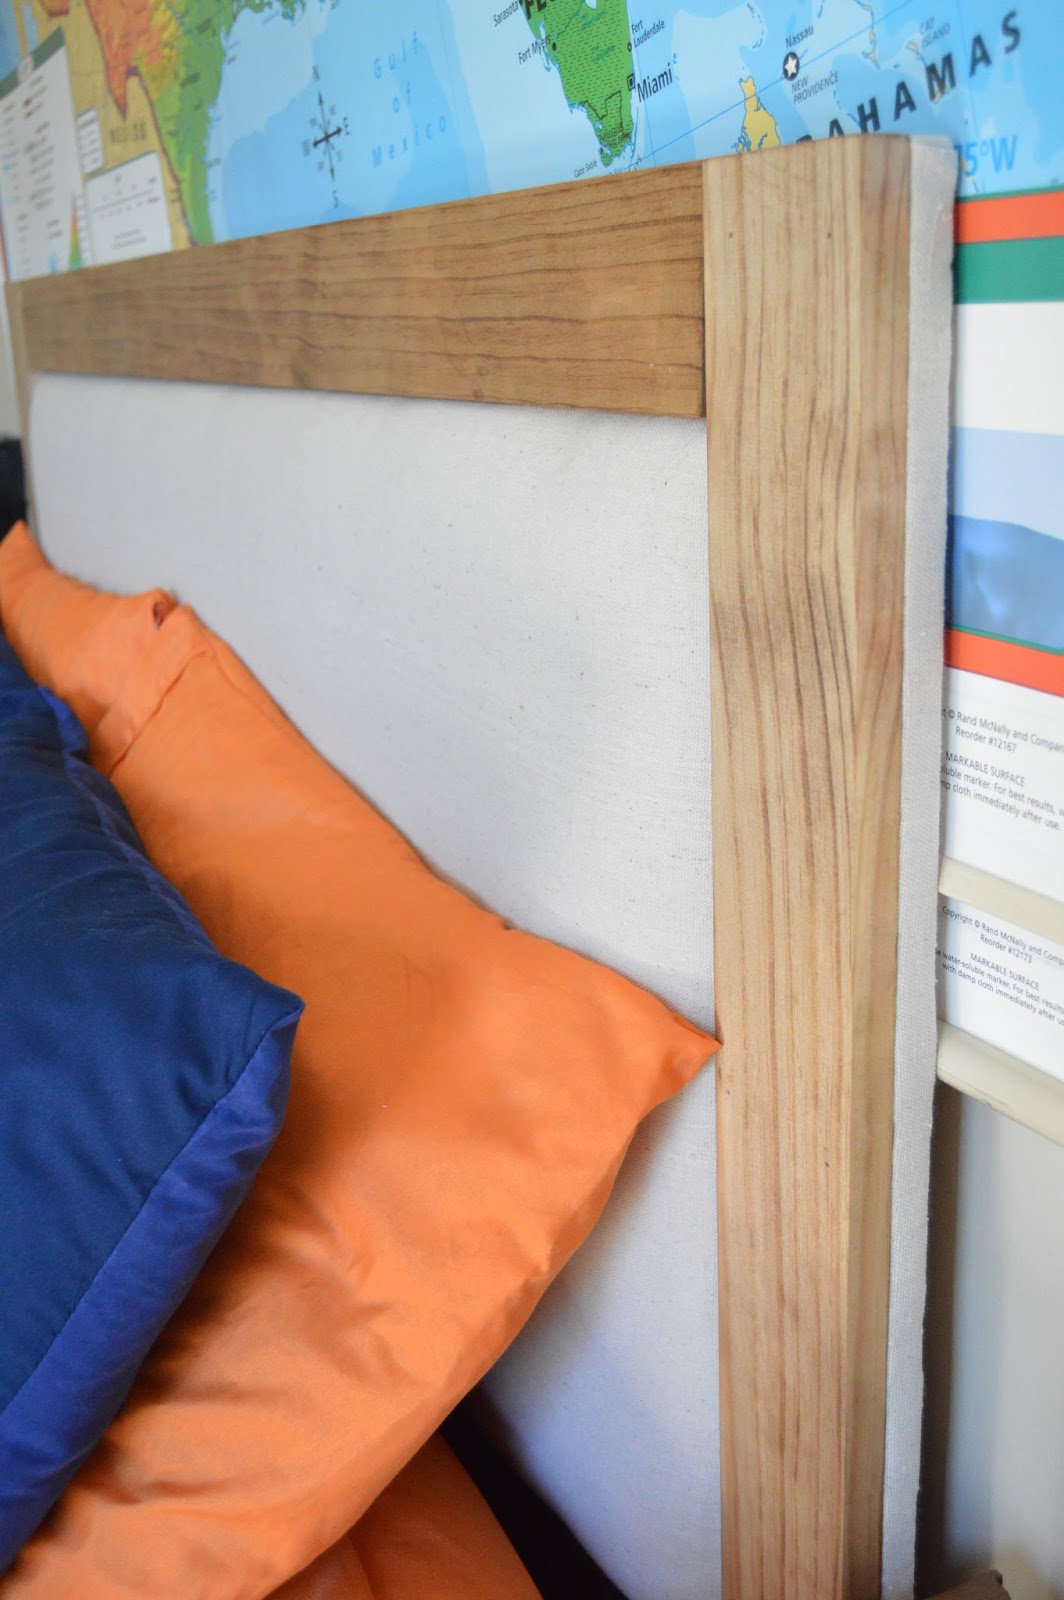
The most recent addition to Zeke's bedroom was the DIY rustic, upholstered headboard we built.  I didn't take any pictures of the process, so I will quickly describe it.  Basically, we cut a piece of 3/4 plywood to size (27"x58") & layered 2 pieces of a foam mattress pad on top of it (a couple of inches smaller than the plywood). Then, we covered it with a canvas drop cloth by stapling it in the back.


I stained 3" pine boards Early American color by minwax & we nailed them to the upholstered plywood, flush with the sides.  We made the two side pieces 48" long, so they would screw into the bed frame. We also reinforced the pine boards by screwing them in from the back of the headboard.


The entire process only took a couple of hours & turned out quite nicely if I do say so myself!


Above the bed, we hung a vintage roll-down map I found a few years ago on a local auction site. We flanked it with two Ikea Rast dressers. Links to the bedding can also be found here. The green pillow fabric came from JoAnn's-- I'm not sure what it's called.


We made use of the small wall between the two doors by adding some shelves to hold more of Zeke's things.


  Because of the tight space, we built a pull-down desk and an upholstered stool below the shelves.


 It's not the prettiest thing to look at, but I love how much space it saves & it's functionality.


Overall, this space is much better suited for Zeke.  It offers plenty of storage & fits his personality well, since most of the decor consists of his collections & artwork.  Hopefully, it will last him a long time!


Girl’s Bedroom Makeover: The Reveal

Six weeks ago I set out on a mission to completely make-over my eight-year-old daughter’s bedroom, thanks to a linking challenge put out by Linda of Calling It Home.  In the past, the One Room Challenge has been great at motivating me to finish up some spaces in our home.  First, I made over our kids’ bathroom and this past fall, I gave our family room an update.  This time around, my daughter’s formerly cute bedroom had become too much for me to handle!  It was DRIVING ME CRAZY!  It was time to add more storage and make space for all those collections kids seem to hoard. 

Brass Bed

Let’s first take a look at the before so you can truly see how far this room has come:

Girl's Bedroom Before

After coming up with a plan, I set to work painting the walls Cosmic Rays by Olympic.

Tween Girl Bedroom Decor & Ideas

Next, I brought in the furnishings

Parsons Desk & Ghost Chair

I got the Lucite ghost chair from a local auction website for $25.  The parsons desk is from Wayfair.

Tween Desk

The lamp was a thrift store purchase that was sitting in the basement.  I gave it a quick coat of “spring green” paint (Elie’s favorite color) & a new lampshade from Wal-Mart.  I made a DIY bulletin board from some purple foam insulation, leftover fabric, & ribbon.  Eliana also loves the peace sign so I thought this peace sign hand from Hobby Lobby would be a great addition to her desk.

White & Gold Shelves

We added some white shelves above the desk to contain more of her collections & as a place to display some printable artwork.  I neatly corralled her jewelry (in the “spring green” wooden box), rocks, weathered glass, books, coins, & Pokemon cards.

Free Printables

I copied this giraffe (Elie’s favorite animal) trinket dish from A Gathered Home

Girl's Bedding Ideas

The headboard has been sitting in my basement for three years, just waiting to be cleaned up & added to Elie’s room.  I love the way it looks in this space after a few coats of gold spray paint.  I grabbed the sheets from Target and the white duvet & pillow covers are from Ikea.  I made the dust ruffle/bed skirt (Which do you prefer to call it???) with the extra curtain panel I dyed.  If you use pinking shears (to prevent fraying) to cut the short end first & then cut up the middle of the long side you can easily make a full-sized bed skirt from a 57” by 98” curtain panel.  I attached it to the box spring with mattress pins & just folded the two unfinished edges inward.

DIY Sunburst Mirror

I made the pink flower/sunburst mirror above the bed using The Nesters tutorial with pink cardboard & a $10 mirror from Hobby Lobby.  I love the way the Braemore Emperor’s Garden Blossom fabric ties the whole room together.  I made the pillow cover using this 36” pillow from Target.

Braemore Emperor's Garden Blossom Fabric

The night stand is an Ikea Rast I painted white.  You can see how I made the handles here.  I made my own version of some “X & 0” artwork I saw at Hobby Lobby using items I already owned.  I really love her white alarm clock too.  It was a cheapie from Target that comes with fun “fashion wraps”.  The kids love the wraps, but I really love the plain white, so I removed them!

Ikea Rast Nightstand

You can learn all about my experience dying Ikea Ritva curtains in this post.

Cheerful Tween Girl's Bedroom

Here is a view of the wall opposite the bed:

Cool Tween Bedroom

Six weeks ago it looked like this:

Girl's Bedroom Before

Elie now has a comfy chair in place of the 1970’s Barbie house. 

Tullsta Chair

My husband made the peace sign marquee & I gave it a coat of spring green paint.  (Remember, peace signs & spring green are two of Elie’s favorites!)  I’m still working on a way to hide the plug/cord situation & will hopefully be able to explain the process of how we created this light up peace sign soon.

DIY Peace Sign Marquee

The water color pillow was another DIY that I will have to explain another day.  Let’s just say there were quite a few failures before this beauty came to be!

DIY Watercolor Pillow

I spotted this mirror (peek-a-boo!) at At Home (the former Garden Ridge) & knew I had to have it for this room.

DSC_1083

I painted the existing dresser (Aqua Bay by Olympic Paints) & added a faux orchid (also from At Home) & a few pictures to top it.

Tween Room Decor

The final wall in Elie’s room has two doors on it.  Since the actual wall space is pretty small, I decided to create a gallery wall using items she has collected & created, as well as some inspiring messages.

Free Printable Gallery Wall

You can find the links to all the free printables I used (yes, they were all FREE!) HERE as well as how I created the rock & shell art.

Fun & Colorful Girl's Bedroom

I have thirty minutes before Eliana gets home.  I think I’ll go revel in her cute & clean bedroom, because I know it won’t look this good tomorrow!

Here is a look at my plan for the space & the links for each week of the One Room Challenge:


Week One- Pictures & a Plan
Week Two- Paint, Paint, Paint
Week Three- Furnishings
Week Four- Gallery Wall of Free Art
Week Five- Third Time’s a Charm: Dying Curtains

I hope you will head over to Linda’s blog to check out all the wonderful room makeovers!  I fully intend to spend the weekend looking at every single one! 


Sharing Your Turn to Shine link party at Joy in Our Home too!

Joining the Pretty Preppy Party

LinkWithin

Related Posts Plugin for WordPress, Blogger...