Showing posts with label Entry Way. Show all posts

Home Tour: The Entry

After almost four years of blogging, I am finally putting together a legitimate home tour for you all!  In November, my husband bought me an early Christmas present: A DSLR camera!  Since I finally have a camera that takes quality photos, I figured it was time I re-take pictures of all the decorated spaces in our house to create a tour.  When I have re-revealed all the spaces, I will make a “Home Tour” tab at the top of the page.

I figured the tour should start in the entryway, but first, here is an older (non-DSLR) picture of the exterior:


I took this picture after we painted the front door black & added some new lighting outside.

Entry Table

When you step inside, you’ll be greeted with this cheerful dresser (The color in the image above isn’t very accurate.  It’s more of a gray/blue color than a baby blue!) and a sea of linoleum, that we will hopefully be replacing with hardwood flooring in the next few years.

Entry Table Styling

I printed off some stock images of doors to create some unique art for the entry.

Entryway Art

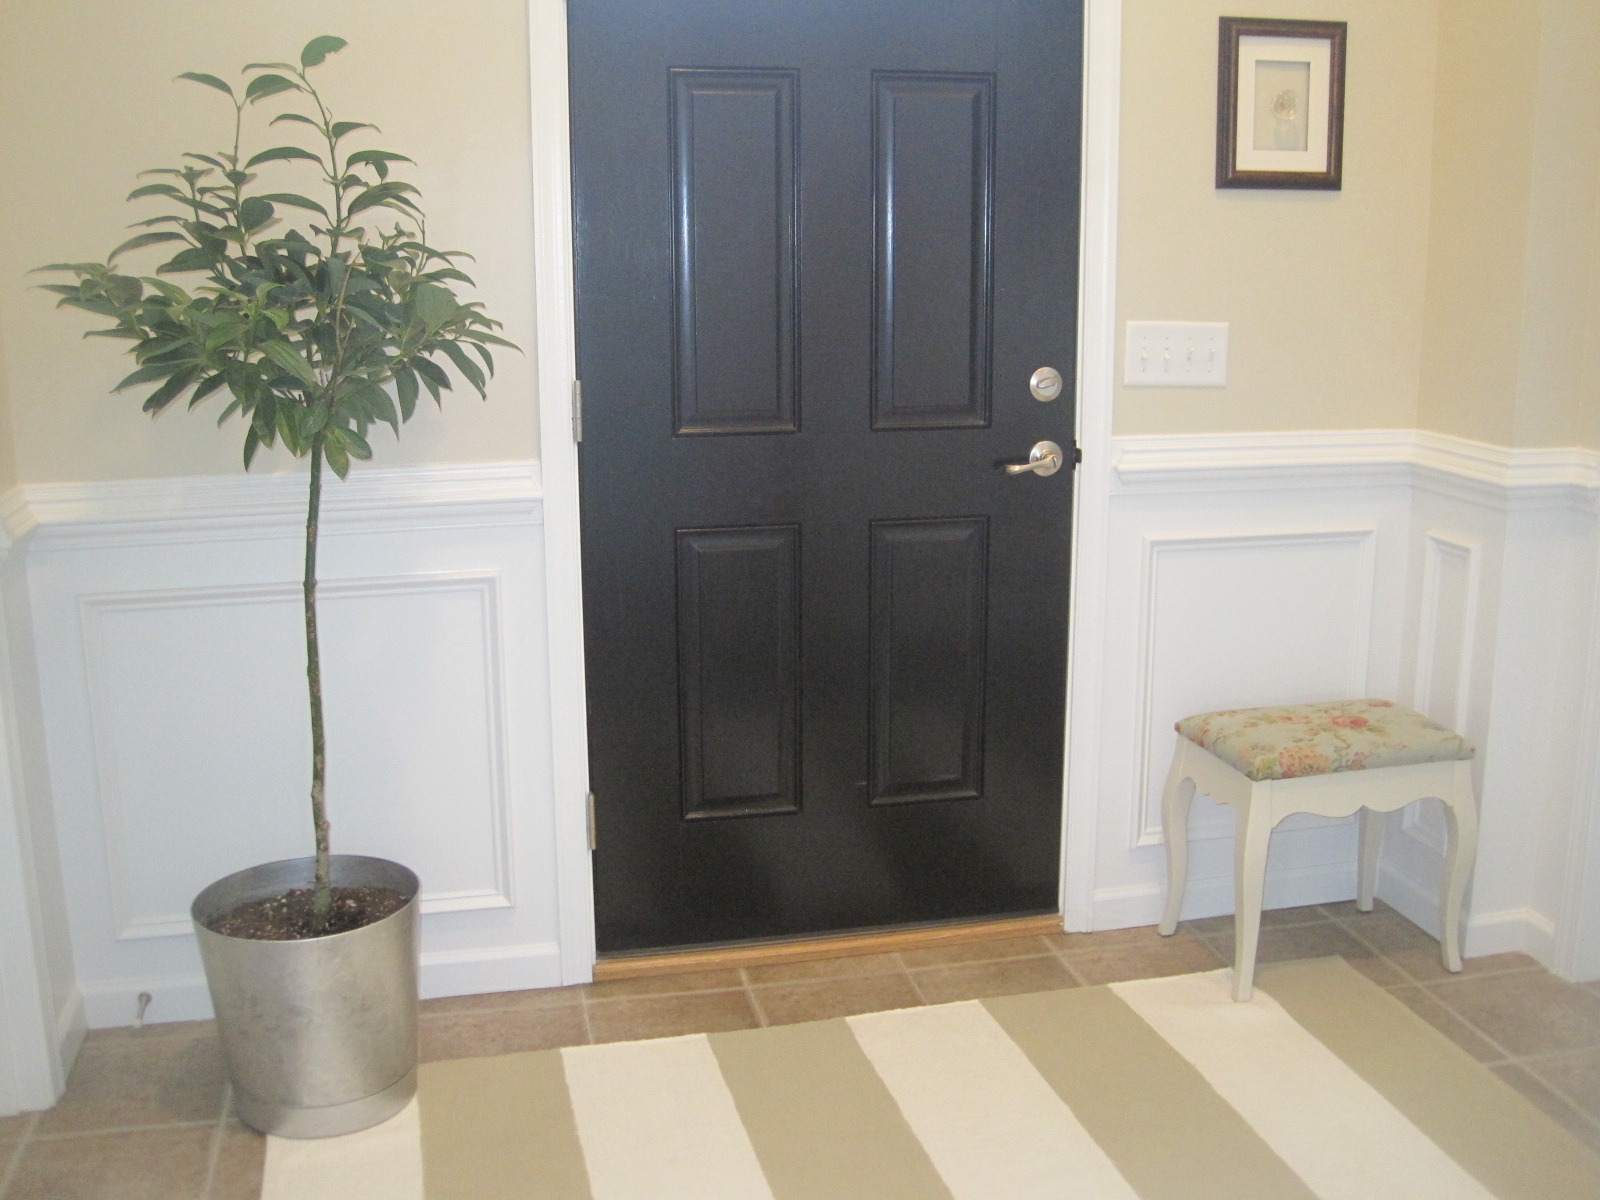
We painted the walls, Toasted Almond, by Olympic & added chair rail & wainscoting to make the entry feel more formal.  Someday I hope to have a prettier door, but for now the black paint dresses it up a bit.

Front Door

I made some more art with pictures of our first & current home on the waterlogue app.  (I don’t know why this picture turned out so blurry… Obviously I am still trying to figure out my camera!)

DSC_0599

Another project still on the list for this space is to add some different newel posts & stain the orange-y oak railings a darker color.

Stairway

Here are a couple of pictures of the upstairs hallway.  Not all that interesting, but it gives you an idea of the layout.

Upstairs Hallway

DSC_0616

DSC_0610

To see links to all the projects for this space, click here.  Thanks so much for stopping by!  I’ll be back Thursday with an updated tour of our study!

The View From Here

Sometimes when I'm sitting on the couch & I see this view, I see past the imperfections & it makes me happy!  The cheerful pop of the blue dresser & purple orchid reminds me of how much I like our house & how fortunate I am to live in a home this beautiful.

IMG_8700

When I see this after coming down the steps & turning the corner, it evokes that same feeling.

IMG_8701

The living room & dining room are also some of my favorite views in the house.  The pop of pink flowers & blue pillows with the shiny sunburst mirror & unexpected (but neutral) zebra print on the chairs are just a few of my favorite things in this space.

IMG_8698

Of course, this is one of my very favorite things to see in here!  Most people say they don't use their formal living & dining rooms, but we definitely use ours every day.  The covers on the dining room chairs make for a great hideout (much to my chagrin), & obviously there are races through these rooms, & Zeke usually lays on the couch to read, away from distractions in other rooms.

IMG_8689

Another favorite spot... but I'm usually the one in the chair (probably a little too much)!

IMG_8697

I'm so glad to have a few spots in my home where I can see past the linoleum floors, oak railings, & dirty carpets!  So, what's your favorite view at home?

$5 Decorating: House Warming Gift

If you haven’t heard of the new Waterlogue app, you must be living under a rock!  I’m pretty sure every home décor blog has been singing it’s praises for the last couple of weeks!  It is an app only available for Apple products that converts photos into watercolors.  We usually don’t spend money on apps, but for $2.99, I figured this app could help create endless amounts of cheap artwork for our home, so we splurged! 

A couple of months ago Evie pulled our Canela Tree out of the pot, ending in a plant fatality. 


I decided not to replace the plant, since the area gets very little sunlight, & instead wanted to add artwork to the space.  I found a couple of pictures of our first home & our current home & decided to play around with the app.  Here are the “before” & “afters”.

le conte

2014-02-05 22.23.20

IMG_3051

2014-02-05 22.21.12

After picking up a couple of $5 11x14 frames (with mats) from Wal-Mart, here they are in the entry:

IMG_8484

IMG_8485

I think this idea not only makes for great, cheap “art,” but it would also make a great housewarming gift or going away present!  (Not to mention, it would be great for making easy cards as well!)

So, are you obsessed with this app yet?

New Entry Table Accessories

I finally got around to restyling the dresser in the entry way.

IMG_6844

Here is what it looked like before:

IMG_3778

Nothing was wrong with it, but I felt the décor seemed a little heavy.

I decided to move the lamp to another room, since we never used it in this area.  I replaced it with some candles that were originally on the mantle.  I added the faux orchid from the dining room to the other side of the table top.

IMG_6846

In the middle, I stacked a few books & placed this glass flower votive holder on top.  I got it at Hobby Lobby for the living room, but decided I liked it better here.

IMG_6847

I really like the pop of color in the orchid!

IMG_6844

I ended up replacing the faux orchid in the dining room with a real one from Ikea.  Originally, I was going to put the real one in the entry, but the dining room provided more sunshine, so I switched them!  My neighbor has several real orchids & told me to give it 3 ice cubes every week.  I’ve been doing it, & so far I have kept it alive! 

IMG_6848

So, have you switched any accessories around lately?  Do you have any tips for a novice orchid grower?  I’d love to hear them!

Tips for Installing Chair Rail & Wainscoting

Last week I mentioned that I would give a tutorial of how we installed our chunky chair rail & wainscoting.  However, since my husband did all the work, I don't quite feel competent to give a full tutorial, but I will give you lots of "tips" on what we did!  You will definitely want to use other sources (google & you tube searches) & look at lots of pictures to figure out exactly the look you are going for & how to achieve it.


To beef up the chair rail, we first added a four inch "base" piece.  (I don't know the technical term for this, but here's a picture so you know what to look for!)

{Base for Chair Rail}

To install this, we basically just marked out a straight line 39 inches above the floor.  We chose this height to match the height of the railings for our stairway.  We then, measured & cut each piece & nailed it in place with the top at the height of 39 inches.  (I recommend using a chalk line or pencil for drawing the straight line.  Don't use an ink pen like my husband did, because you'll have to prime over the ink in order to get your paint to cover it!)

Next, we measured & cut the chair rail.  Obviously, if you are installing it in a corner or on a crazy angle, you will have to measure & cut the angles accordingly.  For the exposed ends, we cut them at a 45 degree angle instead of just making a straight/flat cut.  Mark went ahead & nailed the chair rail into place, centered on the base rail that we had previously installed.  

To cap it off, you will take an extra piece of chair rail & cut it at a 45 degree angle.  Without moving the chair rail, you will bring your saw blade up to a 90 degree angle & cut again.  This should create a filler piece that you can glue onto the end of your chair rail giving it a nice, finished look.  I'm sure most of the above sounds pretty confusing.  You'll most likely want to google a better tutorial on how to do this!

Here's a picture of a capped off end:

{Capped Chair Rail}

One of the most challenging parts of this project was figuring out how to layout our wainscoting.  How much room should we have between the boxes?  How big should the boxes be?  How many boxes should we put on a certain wall?  How small is too small for a box?  It took a lot of head scratching & google searches & in the end, we just had to decide what we thought would be best.  We were really hoping there was something out there that just told us exactly how we should make our boxes!  (Those issues are really the whole reason for this post!  I'm hoping that explaining how we made our decisions will help those of you that are having similar issues!)

First, we needed to decide how much space should be below the chair rail, above the baseboard, & between the boxes.  According to our internet search, the spacing between boxes could be between 2 3/4 inches to 3 1/2 inches, but the spacing above & below the boxes could be up to 4 inches wide.  We decided to go with a 3 inch spacing all around.  (The boxes would start 3 inches below the chair rail, 3 inches above the baseboards, & have 3 inches between them.) 

Since we had determined our spacing, my husband took a scrap piece of our 3 inch chair rail & used it as a template to draw lines 3 inches below the chair rail, above the baseboards, & to create the spacing where the walls ended (corners, door frames, etc.).  This helped us visualize what some of our boxes would look like.

We were still scratching our heads trying to figure out the sizing of our boxes, but seeing the markings on the wall helped us make some decisions about this.  Let me preface this by saying that the boxes on each section of walls should be equal in size, but smaller walls will have smaller boxes, so not all the boxes in the entire space will be the same size.  We decided 32 inches was the widest box we would have.  Any boxes that would have to be over 32 inches in width would be made into two equal sized boxes spaced 3 inches apart.

Take this wall for example:


The wall is only 48 inches wide, & when we factored in our 3 inch spaces on each end of the box, we could have installed one 42 inch box.  Instead, since it was over our rule of 32 inches, we made two boxes that were 19 1/2 inches wide & put a three inch space between them.

To make a basic box, you will cut each piece of molding to the correct size at a 45 degree angle.  Then, glue them into place before nailing them into the walls.  The final steps are caulking around the boxes, filling nail holes, & painting! 

For longer walls, you will have to determine about how many boxes you want along the walls.  This wall was about 131 inches long.  We decided we wanted five boxes on the wall, which would mean we would have 6 three-inch spaces between the boxes.  We multiplied 6 times 3, which is 18 & subtracted it from the length of the wall.  (131- 18= 113)  Then we divided 113 inches by five boxes which meant each box would be 22.6 inches wide.


Some walls were just too small for boxes.  We didn't make any boxes that were smaller than 6 1/2 inches wide. 


{Too Small for Wainscoting}

{At 6 1/2 inches wide, the box on the right is our smallest}

Here are some additional pictures of our wainscoting in tricky areas of our entryway:

{Wainscoting on an Angled Wall}

{Wainscoting on a Triangular Wall}

For this triangular shaped wall, we measured the length & determined how many boxes we thought would look good, making sure they were under our maximum width of 32 inches, & equal in size.  Because of this criteria, the middle box has an extra slanted piece to it.

{Up the Stairs to the Landing}

{Landing to the Top of the Stairs}


Because this wall is broken up by the door, it was okay for the boxes on each side of the door to be slightly different in size.

Well, I hope this post gives you some answers & doesn't leave you scratching your head!  If nothing else, maybe the pictures will give you some ideas on how to add wainscoting on the tricky areas of your walls!

You can see more of the entryway here.

I'll be sharing here:


The Entryway

The entryway is finished!  In the future, we would love to darken the oak banisters, add hardwood floors, crown molding, new lighting, & a beautiful leaded glass wood door, but for now, we are calling it done!

{After}

When you walk in the front door, you see my $10 Goodwill Mirror, $15 Craigslist Dresser, & Entry Art

{Entry Art}

{After}

Click here to learn how we dressed up the entry with chunky chair rail & wainscoting.

{After}

We added more chair rail & wainscoting in the upstairs hallway, along with a gallery wall of family photos.  Right now, the pictures are black & white, color, & sepia.  We made this gallery wall from framed pictures that came from various rooms in our old house, which explains why they are all different colors!  I do plan on updating the pictures & changing them over to all sepia in the near future!

{Gallery Wall}

From the upstairs looking down, you can see the Canela Tree, Black Front Door, Coat Hook, Bench, & Painted Rug.

{After}

{After}

And, just to remind you, this is how the space started out:

{Before}
                       
Sharing here:

Weekend Bloggy Reading               Stuff and Nonsense    

    
     Remodelaholic
Thrifty Decor Chick

LinkWithin

Related Posts Plugin for WordPress, Blogger...