Showing posts with label Decorating;. Show all posts

Girl’s Bedroom Makeover: Paint, Paint, Paint

This past week has been dedicated to all things paint for my daughter’s room makeover.  Well, not quite all things paint—I have a few more things I need to paint for the room! 

DSC_0877

Elie chose Cosmic Rays paint (by Olympic) for the wall color.  It is the same color we used in our family room.  (For some reason it is reading as a light lavender in the pictures, but it is actually a light blue-ish gray color.

DSC_0876

I also painted the doors & trim in her room.

DSC_0956

Speaking of trim, my husband added some around her windows.

DSC_0878

I also painted her dresser turquoise (Aqua Bay by Olympic).  We used this color on the Tarva chest in the family room.  I really love the color in there, but I’m not really liking it on this dresser.  Maybe it’s the pink knobs or the lines at the bottom of the dresser that are throwing it off for me.  Hopefully, it will work out, because I really don’t want to re-paint it!

As for the upcoming week, boxes are starting to arrive & I did make the trek to Ikea, which means furniture assembly & painting await me!  Be sure to check back in for more progress next week!  You can see my plans for the space here.

If you are looking for some inspiration, be sure to check out all the other linking participants taking on the One Room Challenge.  In just four more weeks, there are sure to be some amazing spaces thanks to Linda’s motivation!

Curtains, Pillows, & the Letter Z


Every time I decorate a room, there comes a point where I’m not sure it’s turning out exactly how I had envisioned it.  That is how I had been feeling about my son’s room, until we hung the gallery wall & made a few other additions.  The game changer?

DSC_0866

This marquee letter Z my husband made!  I love the way this corner now boasts green, blue, & orange.

DSC_0840

Basically, it’s a 2x4 cut at crazy angles with holes drilled in it & filled with patio lights.  Still working on how to hide the cord…

DSC_0867

I also made a faux roman shade, which was another near disaster!  (It was completely crooked!  Luckily re-attaching it at the top straightened it out.  I would not have been shocked if it had really been crooked, since I’m horrible at taking measurements!)

DSC_0865

I made a couple of pillows for the bed.  The fabric reminds me of the game Space Invaders.  Anyone remember that game?  Not sure why it brings back that memory, but it made me think it would be great for my video game loving boy’s room.

DSC_0863

We framed out some mirrored glass too, so now Zeke can make sure he is put together in the morning, or maybe just check out his guns!

DSC_0866

DSC_0869

Only three more things to do before this room is considered “finished”…
  • Build a headboard
  • Build a pull-down desk
  • Build a bench
You can check out the plan for the room here.

Since his room looks mostly finished (with the exception of the pile of junk where his desk should be), I am going to be taking a little break from Zeke’s room to whip my daughter’s room into shape.  I will be participating in Linda’s (from Calling It Home) One Room Challenge Linking Party.  I guess I am just a sucker for a challenge!


I will be back Thursday with the plans!

Sharing at the Pretty Preppy Party.


TDC Before and After

Turning Kid Collections into Decor

I believe we have exactly two free weekends between the end of basketball & the beginning of spring soccer!  This past weekend was one of them, so we decided to make the most of it by knocking a few items off the list.

As I have mentioned previously, my son is a collector.  Until recently, some of his cool collections were just sitting in his closet.  In order to inject more of his interests into his bedroom décor, I decided to use those collections as artwork for his walls.

First, I hot glued his collection of shark teeth onto a piece of black cardstock & framed it in a shadow box.  (I surrounded it with a couple of free printables found here & here.)

DSC_0842

Next, we used a couple of nails to mount his collection of state quarters.  (Just a few more to find…)

DSC_0844

My husband built two display boxes for some of his most special rocks.  (This was a lesson in patience for both of us!  Who would have thought making these would have been so frustrating!  Black paint & wood filler are hiding a multitude of problems!)  He made the ceramic owl in school art class.

DSC_0846

DSC_0847

Lastly, I framed a rock, two shells, & a postcard of rocks we got at a “rock mining” tourist trap.

DSC_0849

Who would have thought all those things stashed in his closet could look so cool up on his wall!

DSC_0850

$5 Decorating: Updating Framed Photos

The beginning of the year is always hard on us financially.  We get hit up with some expensive bills this time of year (auto & home insurance, as well as our property taxes) & money is tight.  For the past couple of weeks I have been dreaming of making some changes to our family room & morning room & have honestly felt slightly depressed that I couldn't act on any of those changes until our money situation loosens up a bit. 

As I sat staring at Pinterest & looking back at my goals for this year, I realized there were some small, inexpensive updates I could make that would at least help get me out of my funk.  (First world problems, I know…)  Anyway, I've put together a little series I’m calling $5 Decorating & today we’re talking photos!


The back wall of our morning room held messy faced pictures of my two oldest children when they were younger.  Now that our baby is nearing two, I felt it was finally time to add her mug to this little photo gallery.  I started this little update by re-painting the frames black with some paint I already had on hand.  Next, I ordered a black & white print of my youngest child on her first birthday, & a picture of my husband & I cutting the cake on our wedding day & plopped them in the frames.

IMG_8488

I changed up the accessories on the side table a while ago, using items we already had on hand- a thrift store lamp, tray with some devotional books for the kids, a cheap Ikea bowl I diy’d, & some candle sticks.

IMG_8490

It’s so nice to know that just a little time & money can actually update the appearance of a space! 

So, do you have any frames you need to update?  It’s such an easy task, but one that I almost always put off!

Defining My Design Style

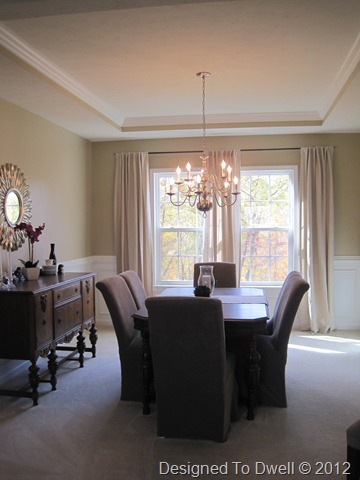
In an earlier post, I mentioned that I had finally figured out my decorating style & was learning to incorporate it into my home.  I have enjoyed interior design for as long as I can remember & thought I knew what I was doing when it came to decorating my own home.  It wasn't until we moved in this house & I began blogging that I realized I didn't have a clue!  The family room had a cottage vibe:


The study was strictly traditional:


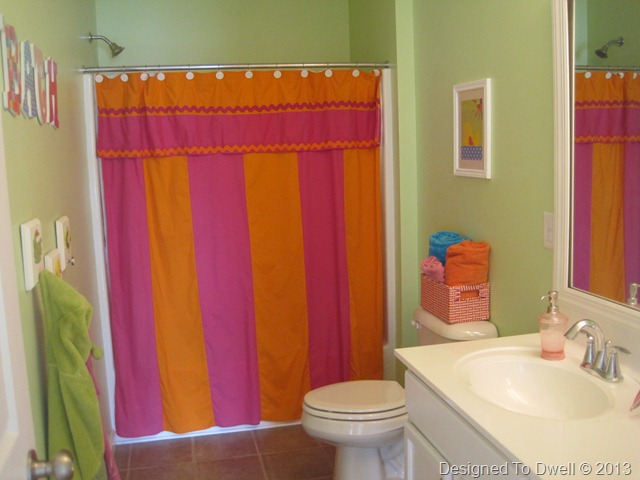
The upstairs bathroom was a bit whimsical:


I had just began reading home décor blogs when we moved in this house.  This made things even more confusing!  I had become inundated with so many beautiful spaces of all different styles.  At this point, I began making more decorating mistakes!  I would decorate a room & then hate it!  I felt clueless & frustrated. 

At this point, I realized I needed to put a little more thought into what I liked, décor wise.  I began pinning images of rooms that I loved.  Occasionally, I would go through my Pinterest boards & delete anything that I didn’t like.  I studied my favorite rooms & noticed some similarities.  Based on those, I realized that I am still pretty traditional at heart, but with a modern twist.  I appreciate clean lines & neutral colored walls & upholstered furniture.  I like cheerful pops of color, but prefer them in accessories rather than on the walls.  I like classic finishes that will stand the test of time.  Knowing these things has really helped clear up my décor confusion.


To prevent any more design confusion, I also stopped following some home décor blogs that didn’t fit my new found taste.  I felt pretty bad about doing so, but I realized it needed to happen if I wanted to own my style.


Now that I have a pretty good grasp on what I like, I can ask my self questions before buying furniture or redecorating a room to ensure that I stick with my style.  For instance, if I am getting ready to purchase a piece of furniture, I can ask myself:  Does it have clean lines?  Is it a classic style?  Making sure the décor choices fit my style will help eliminate most of my decorating mistakes.


When I finally felt like I had it all figured out, I began making changes to our house to reflect my new found style.
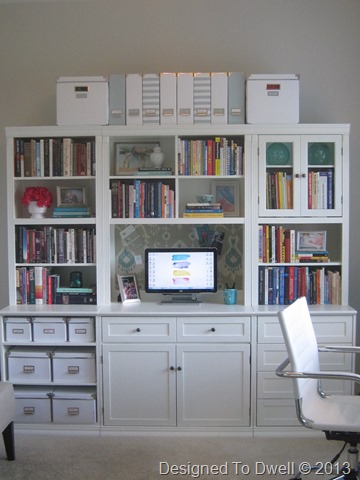


If you are struggling to find your style, I recommend you go through magazines or browse the internet for rooms whose style you love.  Study the rooms closely to find similarities.  Ask yourself questions like:

What is the overall style of these rooms?  (Traditional, Modern, Eclectic, Contemporary, etc.)
How is color used in these spaces?
What types of finishes are used in these rooms?

Once you have answered these questions, it should give you a pretty good idea of things you like.  Make notes about what you like about each space, & remove any spaces that don’t fit your style.  Whenever you are in doubt about whether something fits your décor style, go back through these images & your notes, & see if it fits.

I am definitely not an expert, but I felt that I would share how I came to understand my personal decor preferences.  I would love to know if you found these suggestions helpful or if you have other ways to help interpret your style.  Let me know!

Around the House

Last week I went to Ikea in search of some items for the kids’ bathroom makeover.  While I was there, I grabbed a couple of throws for the living room & study.

Eivor Throw

I bought the Eivor throw for the living room.  (Hopefully, I’ll recover these chairs once the bathroom is finished.)

Ransby Throw

I went with the Ransby for the study.

A while ago, I gave a quick update to this small entry bench.

Entry Bench

I painted the legs black & added some Greek Key fabric to the top.

Greek Key Bench

It definitely fits my style better than the version before!

This black & white trellis pillow has been sitting in the dining room since I bought it over the summer.  It was originally meant to go outside, but I decided I liked it better here.

Black & White Trellis Pillow

After switching the laundry to the dryer, this little cutie tried to go for a spin while I gathered the next load!  (Looks like those socks could use a good washing!)

IMG_7778IMG_7780

Obviously, I have my hands full!

LinkWithin

Related Posts Plugin for WordPress, Blogger...