Showing posts with label Kids' Bathroom. Show all posts

Home Tour: Bathrooms

Here are some glimpses of our powder room & my kids’ shared bathroom.

Powder Room

We needed to use our small powder room as a spot for our kids to brush their hair & teeth in the morning.  We took advantage of the vertical space & added shelves above the toilet that store toiletries & extra bathroom supplies.

Floating Shelves

Small Bathroom Storage Idea

DSC_0640

To see all the projects from this space, click here and here.

Extra Bathroom Storage

Upstairs, one of our full bathrooms is used by both our son & daughters.

DSC_0619

The décor was inspired by the book Harry the Dirty Dog.

DSC_0632

I painted the vanity black, framed the mirror, & added a black toilet seat to make this builder’s grade bathroom have a more custom look at an affordable price!

DSC_0623

I hung a pair of striped curtains at ceiling height to create a more spacious feel & added art to the inside of the shower for the pretty factor.

DSC_0622

Some framed pages from the book this look was inspired by fill up an empty wall.

DSC_0629

Coral & white towels hang below the art.

DSC_0634

Click here to see all the projects & sources for this space.

DSC_0620

So, that completes the tour of finished spaces!  On Tuesday, I’ll share the plans I have for my son’s room with you.  Hopefully, I can add another room to the tour soon!

Gray & Coral Bathroom

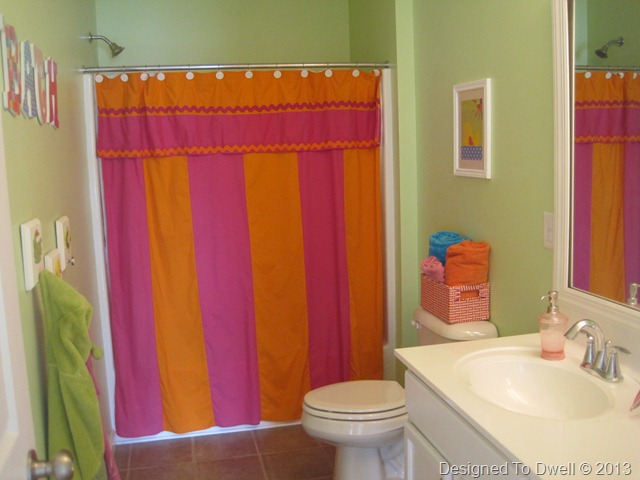
Nearly eight months ago, I updated my kids’ neon green bathroom to a more calming, neutral room with pops of color.  I still absolutely adore this room & it seems to be holding up pretty well.  I love the pattern in the striped shower curtains, the black toilet seat, & the pops of color in the towels, artwork, & yellow dog (which was something I wasn't sure if I would keep).  The only change I have made to this room is that I raised the artwork in the shower slightly higher & put a nail in the drywall to hold it, after it fell several times & scratched up the tub (magic eraser to the rescue…). Unfortunately, the pictures I took of the room didn't turn out very well, so I decided to try to take some with my son’s new camera.

DSCF2846

DSCF2865

DSCF2867

DSCF2848

Oh well!  I’m not sure those are much better!  The only thing left to do in this room is replace the flooring.  I would love some classic white & black hex tiles, like these.

Hanging Double Shower Curtains & Shower Art

Despite the fact that my kids’ bathroom does not boast beautiful tiled walls, I opted for an opened double shower curtain anyway! 

How to hang a double shower curtain

To pretty up the inside of the shower, I decided to hang this outdoor decoration I found at Hobby Lobby.

Hanging art in the shower

It is pretty light weight, so I just use a suction cup hook & it has held up very well for the past four weeks.

Hanging decor in the shower

I purchased 96” curtains from this e-bay seller (I chose the 50” width & the hidden back tab option).  I used the original shower curtain rod & just moved it as high as it could go, after sliding the curtains on it.

Double shower curtain

I had purchased a 96” clear vinyl shower curtain liner & just hung it on an adjustable dowel curtain rod behind the larger curtain rod.

Liner for a double shower curtain

You can’t really see this rod, unless you are in the shower or standing directly below it, looking up!  I keep the liner pushed to one end, hidden behind one curtain panel.

Lining a double shower curtain

I searched all over for how to achieve this look, so hopefully someone will see this post & it will make their life easier! 

Kids’ Bathroom Sources

So, a few weeks have past since the One Room Challenge ended, & I am finally getting around to posting the sources for the bathroom.  Oops!

Kids Bathroom

The walls are painted Quill by Olympic Paints.

Harry the Dirty Dog Bathroom

Soap Pump/ Mirror/ Book Art/ Towel Hooks/ Coral Towels/ Bath Brush

Neutral Kids Bathroom with Pops of Color

Candle/ Hand Towels/ Toilet Seat

Art above toilet

Art/ Dog

Gray Striped Shower Curtain/ Coral Towels

Shower Curtains/ Shower Flower

Bucket of Towels

Black & White Towels/ Bucket

Kids Bathroom

I think that does it!  If the link just went to the store & not the actual item, it means I couldn’t find the item online.  Let me know if I forgot anything!  Click here to see more bathroom details!


Neutral Gray Kids’ Shared Bathroom

Well, the end of the six week One Room Challenge is officially over and…. the bathroom is finished!  Click here to see the week by week details.


In order to truly appreciate the after pictures, we should take a look at what the bathroom looked like “before”… (That’s my work too!)


I came up with a plan, inspired by the book Harry the Dirty Dog:


Here’s what the bathroom looks like today:

IMG_8018

IMG_8011

IMG_8020

IMG_8024

IMG_8025

IMG_8013

Double Shower Curtains

Gray & Coral Bathroom

Kids Shared Bathroom

Striped Shower Curtain

I’ll have to come back later & share my sources, since I’m running late for Bible study!  Sorry for the POOR quality photos!

Sharing here too:

Remodelaholic

ORC Week 5 Bathroom Stall…

The kids’ bathroom redo is not going as well or as easily as I had hoped.  It’s almost comical now how nearly every project has had some sort of mishap.  Let’s take a look at what has gone wrong during this challenge:

1. After painting the vanities black, I had my husband install some handles on the faux drawer fronts under the sink.  Doing that caused the paint to peel off the entire drawer front on one drawer.

IMG_7941

It looks much better now, but I think the lesson is that when using “self priming” paint, you still need to prime the surface first, especially if you are painting over a glossy finish.

2. My kids spent three weeks without a toilet seat, since it took me that long to spray paint it.  Every time I would flip it around to paint another section, the paint would chip off of the previously painted part.  Here is what the toilet seat looks like today:

IMG_7940

I’ll be pulling the trigger on this one pretty soon!

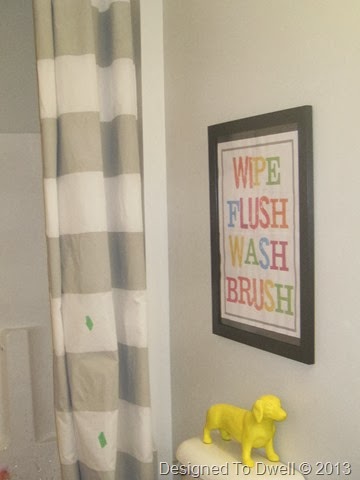
3.  After spending a couple of hours painting some curtains for the shower, I had several mishaps.  The paint bled (due to my watering it down), my hand/roller slid onto a “white” stripe, & my toddler made footprints through several spots!
 IMG_7938

It doesn't look so bad from a distance, but I can’t handle the imperfections up close:

IMG_7939

I've ordered some custom-made curtains, but they are coming from Hong Kong!  I’m really hoping I get what I ordered & that they get here before next week’s reveal!

To add to all the DIY failures, I have had some design dilemmas.  Obviously, I have varied from my original plan & decided to add some pattern to the shower curtains.  I’ve also changed my mind on the black & white towels & decided to add some color.  You’ll have to wait for the reveal to see them though!

On top of all that, I paid for a shower curtain rod & never brought it home… or so I thought!  After searching the house, I called the store to tell them I must have left it there.  They kindly let me grab another one.  Two days later I found the rod in my closet!  Looks like I’ll be returning one of them back to the store (hangs head in shame!)…

So, have you ever had projects where nothing seems to go right?  The good news is, I think the bathroom is going to look great, once it’s actually finished!

I'm sharing this post as part of the One Room Challenge Link party at Calling It Home.  Be sure to stop by & check out all the awesome makeovers going on!


Updating a Toilet Handle & Seat

It’s time for week four of the One Room Challenge bathroom makeover.  This week, I gave a couple of upgrades to our toilet area.


I started the first upgrade about a month ago, when I decided to spray paint the toilet seat black, to bring in some of that classic charm I was looking for.  After removing the yellow-tinged seat (Lift the flap where it is attached to the toilet base & unscrew the bolt holding it in place.) I coated it with about a million coats of this spray paint:

Painting a Toilet Seat

IMG_7750DIY Black Toilet Seat

Once it had dried, I gave it a couple of coats of spray sealer.  I decided to try & DIY this project after searching online for black toilet seats & seeing that they cost about $100.  After spending $17 on this project & realizing it probably wasn’t going to hold up, I noticed elongated black toilet seats at Home Emporium for about $18.  My DIY one will work for now, but as soon as I get my budgeted money, I will probably be replacing it!

Replacing a Toilet Handle

Next, I decided to replace the generic white handle that came with our toilet.  I found this chrome handle at Wal-Mart for about $4.

Replacing a Toilet Handle

The directions on the back looked pretty easy, but when I looked inside our tank, I noticed our handle didn’t have a chain.

IMG_7873     How to replace a toilet handle

I started by unscrewing the nut on the inside of the handle.  Once it was unscrewed, I could pull out the old handle.

how to replace a toilet handle

Next, I inserted the new handle (1), slid the nut on the rod close to the handle & pushed the other end of the rod into the flusher hole (not a technical term… 2), & finally tightened the nut to the handle (3).

IMG_7877IMG_7879IMG_7880

New Toilet Handle

Here are some beauty shots of the toilet now…

Updating a Toilet

Upgrading a toilet

For the final part of the update, I needed some art to go above the toilet.  In Microsoft Word, I simply created a border using a text box & then added the following words in a font & colors that I liked.

bathroom art

Then, I went to my print options under “properties” & clicked on “layout”.  I chose to print this as a 2x2 page poster.

DIY Poster Art

Next, I used my paper cutter to cut the white boarder off some of the edges, so I could piece it back together.  I used a glue stick to attach each piece & finally framed it...

Free DIY Poster

and hung it above the toilet.


Bathroom Updates


So, that’s where the bathroom stands today.  I’m currently making a mess painting curtains & things are NOT going well!  I thought I would be long done with this bathroom before the end of the challenge, but now I’m wondering if I’m even going to make it to the finish line in time!

Check back next week to see what comes of these curtains!

LinkWithin

Related Posts Plugin for WordPress, Blogger...